A film shot five years ago in 1080p can look tired beside today’s 4K. Bride&Groom.video tackles that with Topaz Video AI alongside DaVinci Resolve, comparing two workflows and arguing for treating clips one at a time instead of forcing a single preset on everything. The settings that pull their weight get named too, the Proteus preset, noise reduction, Focus Fix. Most relevant for filmmakers sitting on dated footage, or couples who’d love an old wedding video brought current.
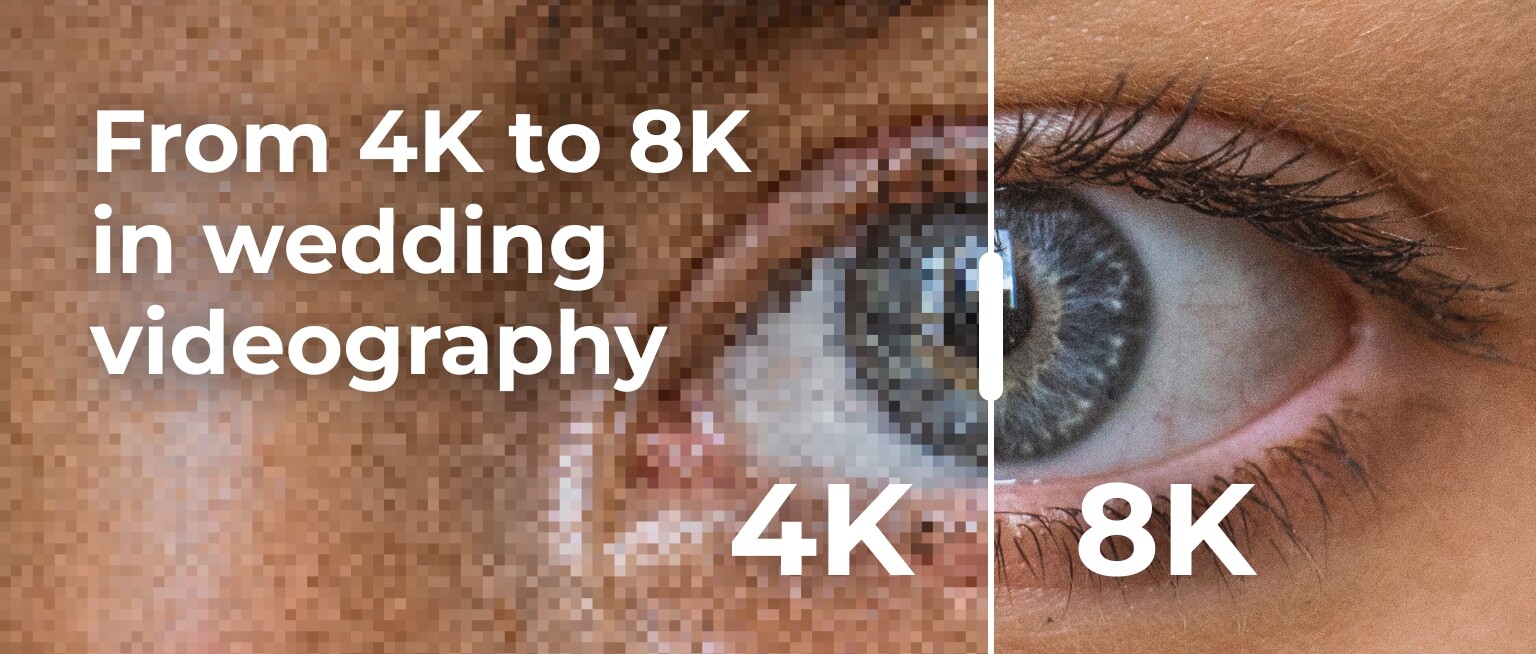
Couples are always looking for timeless wedding films, and as a skilled wedding videographer, you know how to deliver. But even the best filmmaker can’t account for quickly changing technologies. A film made five years ago can look dated quickly as higher quality pictures become the new norm. The 1080p videos that were standard delivery a few years ago now look blurry and outdated compared to the 4K and 8K videos of today.
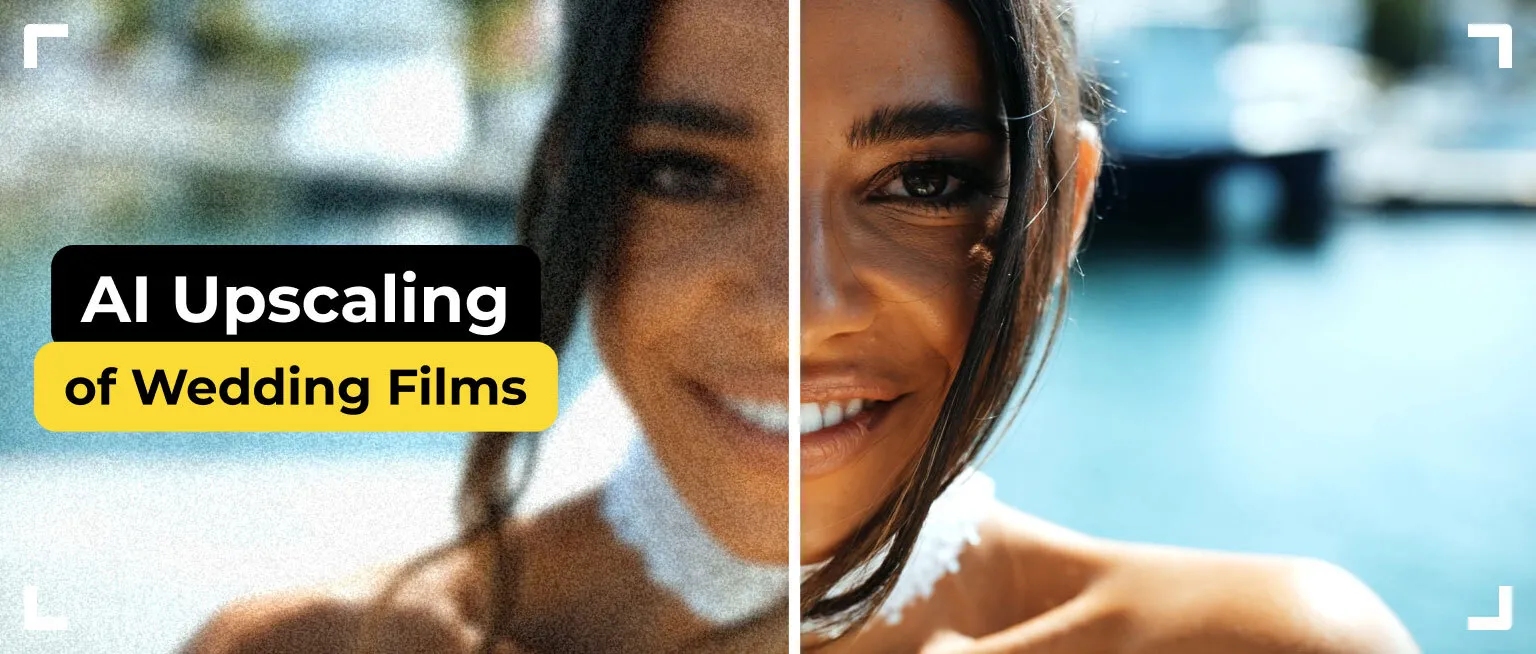
Recently, a client approached us with this exact problem. She requested that we upscale the 1080p footage from her wedding video and get a higher quality film using the files she had. It sounds like a challenge and we went all in!

What is AI Upscaling?
Artificial intelligence upscaling is a technique that we as video editing experts can use to enhance the quality of a video. The technology can analyze a video clip and “predict” missing pixels, adding them in artificially to create a better resolution or higher quality wedding film. Using AI to upscale a video is a new technique, and one that Bride&Groom.video is excited to be on the forefront of implementing.

Our Favorite Tool: Video AI from Topaz Labs
Given our experience, the best tool for AI video upscaling on the market is Video AI from Topaz Labs. We have also tested UniFab All-In-One, AVCLabs Video Enhancer AI, VideoProc Converter AI, HitPaw Video Enhancer AI, and Video Enhance AI, but have found Topaz’s AI to be the best. It enables significant improvements in video sharpness and detail by increasing its resolution. This software uses specialized machine learning models trained on thousands of images and videos. As a result, Topaz Video AI can effectively reduce noise, enhance textures, and add realistic details that weren’t present in the original video.
Bride&Groom.video is a member of their beta-testing community, and we can definitely say this product is far advanced compared to the competition. So, it was a natural choice when completing this project for our client.
Combining DaVinci Resolve 19 and Topaz Video AI
We saw DaVinci Resolve 19 as the ideal editing program for this project. It provides users with advanced tools for color correction, video processing, and sound editing. Working together with Topaz Video AI, DaVinci Resolve allowed for additional noise reduction and fine-tuning of color and lighting, making the video more vibrant and lifelike.
The Two Approaches to Video Upscaling
The AI upscale process involves several steps: loading the original video, analyzing and processing it with Topaz Video AI, followed by final adjustments and export in DaVinci Resolve. This comprehensive solution allows even the oldest and lowest-quality videos to be transformed into modern, high-quality content suitable for display on large screens. The higher the quality of the original video, the better the results after upscaling. However, even with a resolution as low as 360p, significant improvements can be achieved.
We tested two approaches to AI upscaling using the instruments described above.
A simpler way that we would recommend for beginners is to upload the entire video to Topaz and work with it there. It can be a good and fast option if your video is shot on one camera in one place, and has the same lighting throughout the entire film.
But if you’re a cinematic wedding filmmaker, combining a variety of shots, cameras, lighting, and locations, we doubt you’ll be able to find one Topaz preset that will work well for all of them. The solution we recommend for professional videographers and film editors is to separate the clips and work on each of them individually in Topaz before reconnecting them and fine tuning the entire film in DaVinci Resolve. Enhancing each video clip individually will have a much better result because we can apply different methods and settings for each clip.
Our Process, Part 1: AI Video Upscaling in Topaz AI
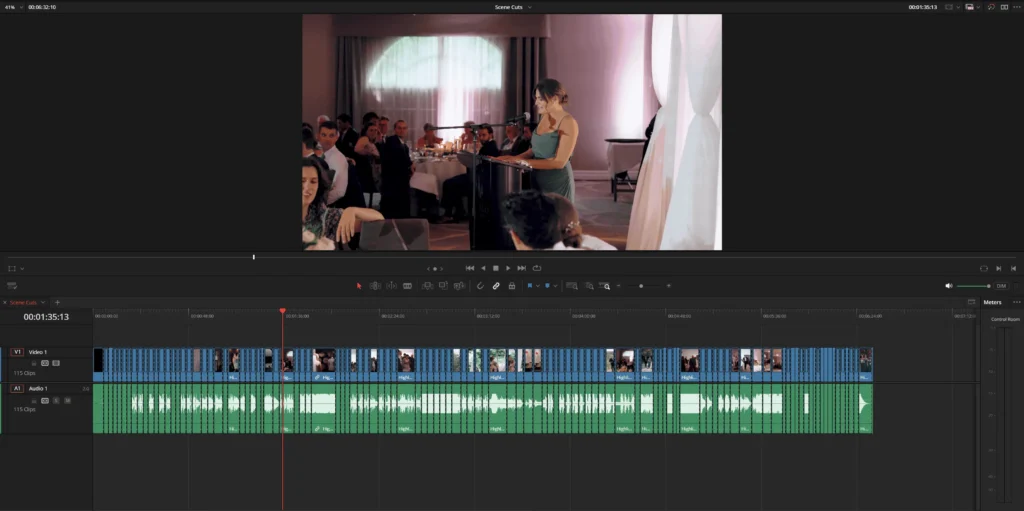
First, we loaded the entire video into DaVinci Resolve and cut it down into individual clips. It’s important to note that the number of clips in a video can vary. For example, one 5-minute video may contain 100 clips, while another might have 150 clips. This difference is crucial because the number of clips directly affects how quickly the video can be enhanced.
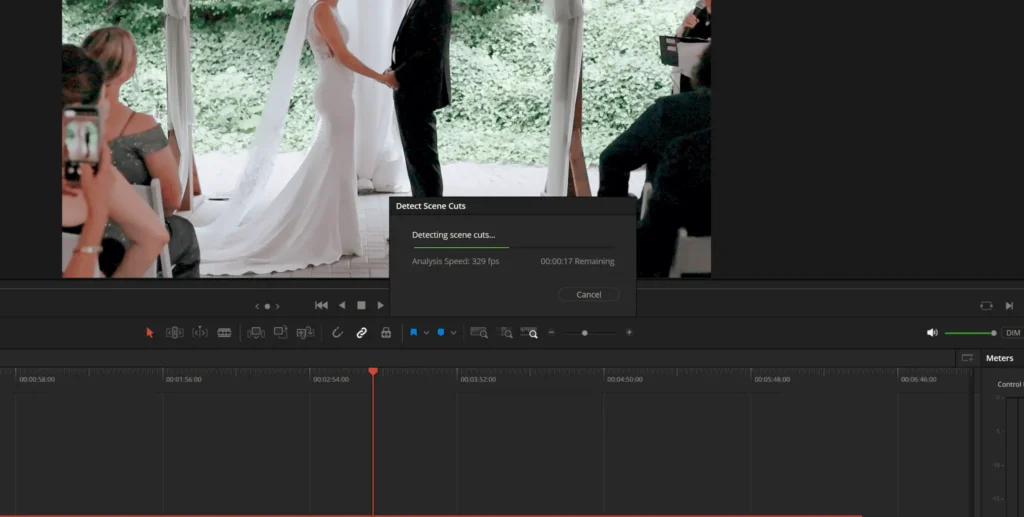
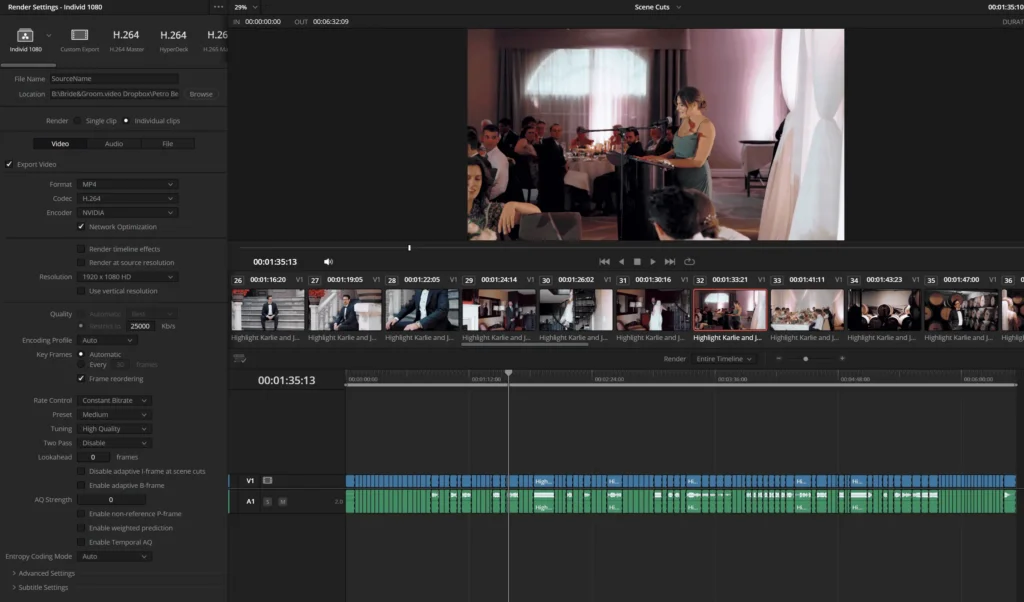
Once cut, we exported each clip into a folder separate from the original video. This allowed us to proceed with upscaling each clip individually in Topaz AI.
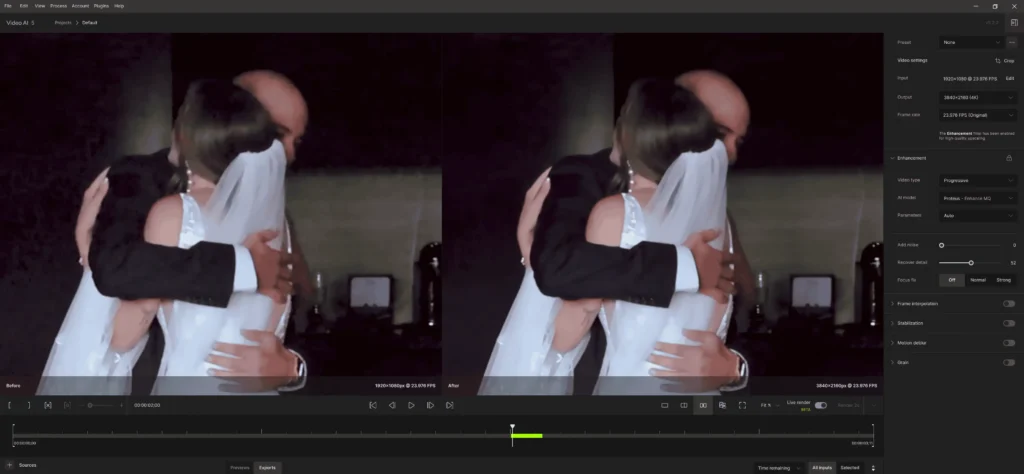
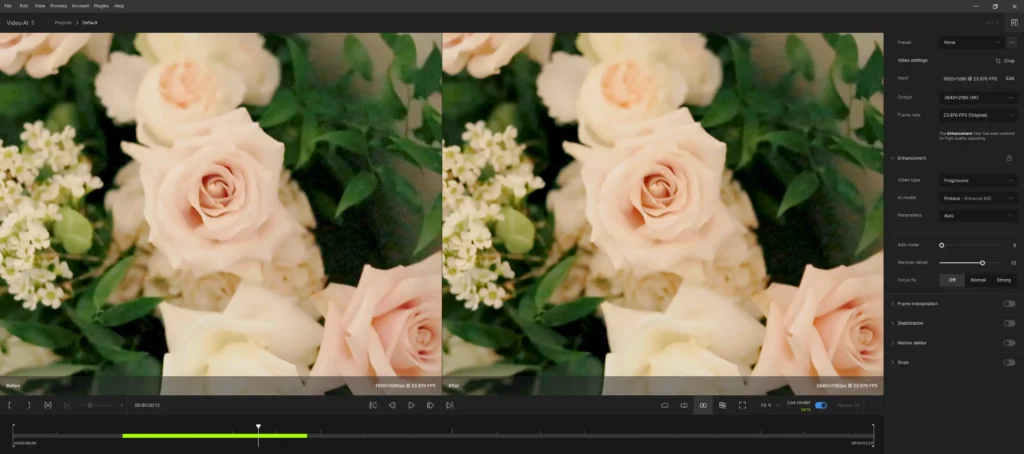
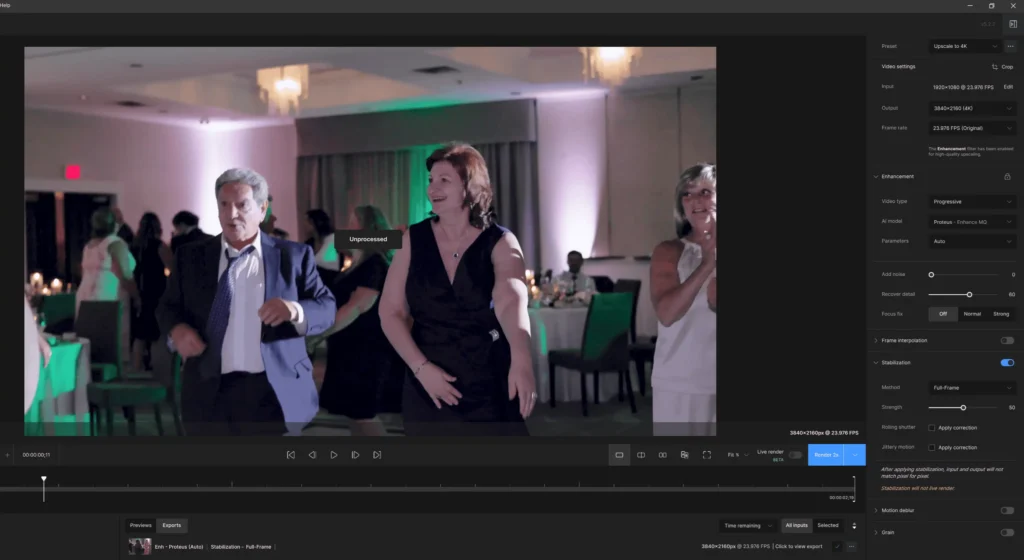
With the clips uploaded into Topaz AI, we had to adjust the settings for each one. After conducting various experiments, our team determined that the best preset for wedding films is Proteus – Enhance MQ. Next, we fine-tuned the Recover Detail parameter for each clip. We set the Add Noise parameter to 0 to ensure maximum noise reduction for the clips. The settings are displayed in the top right corner of the screenshot.
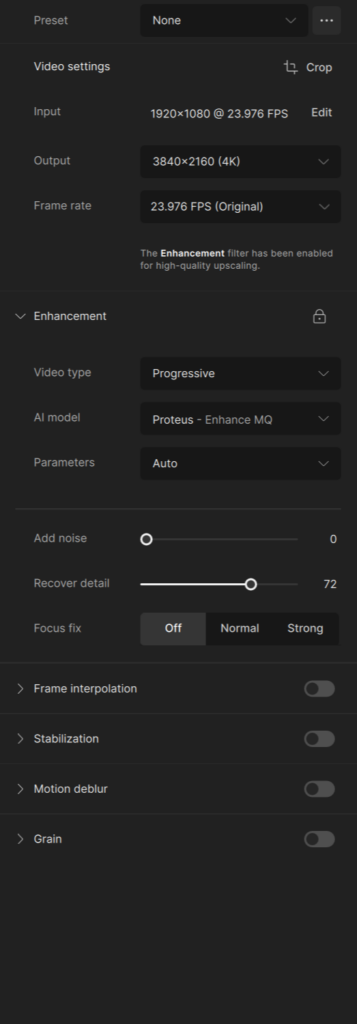
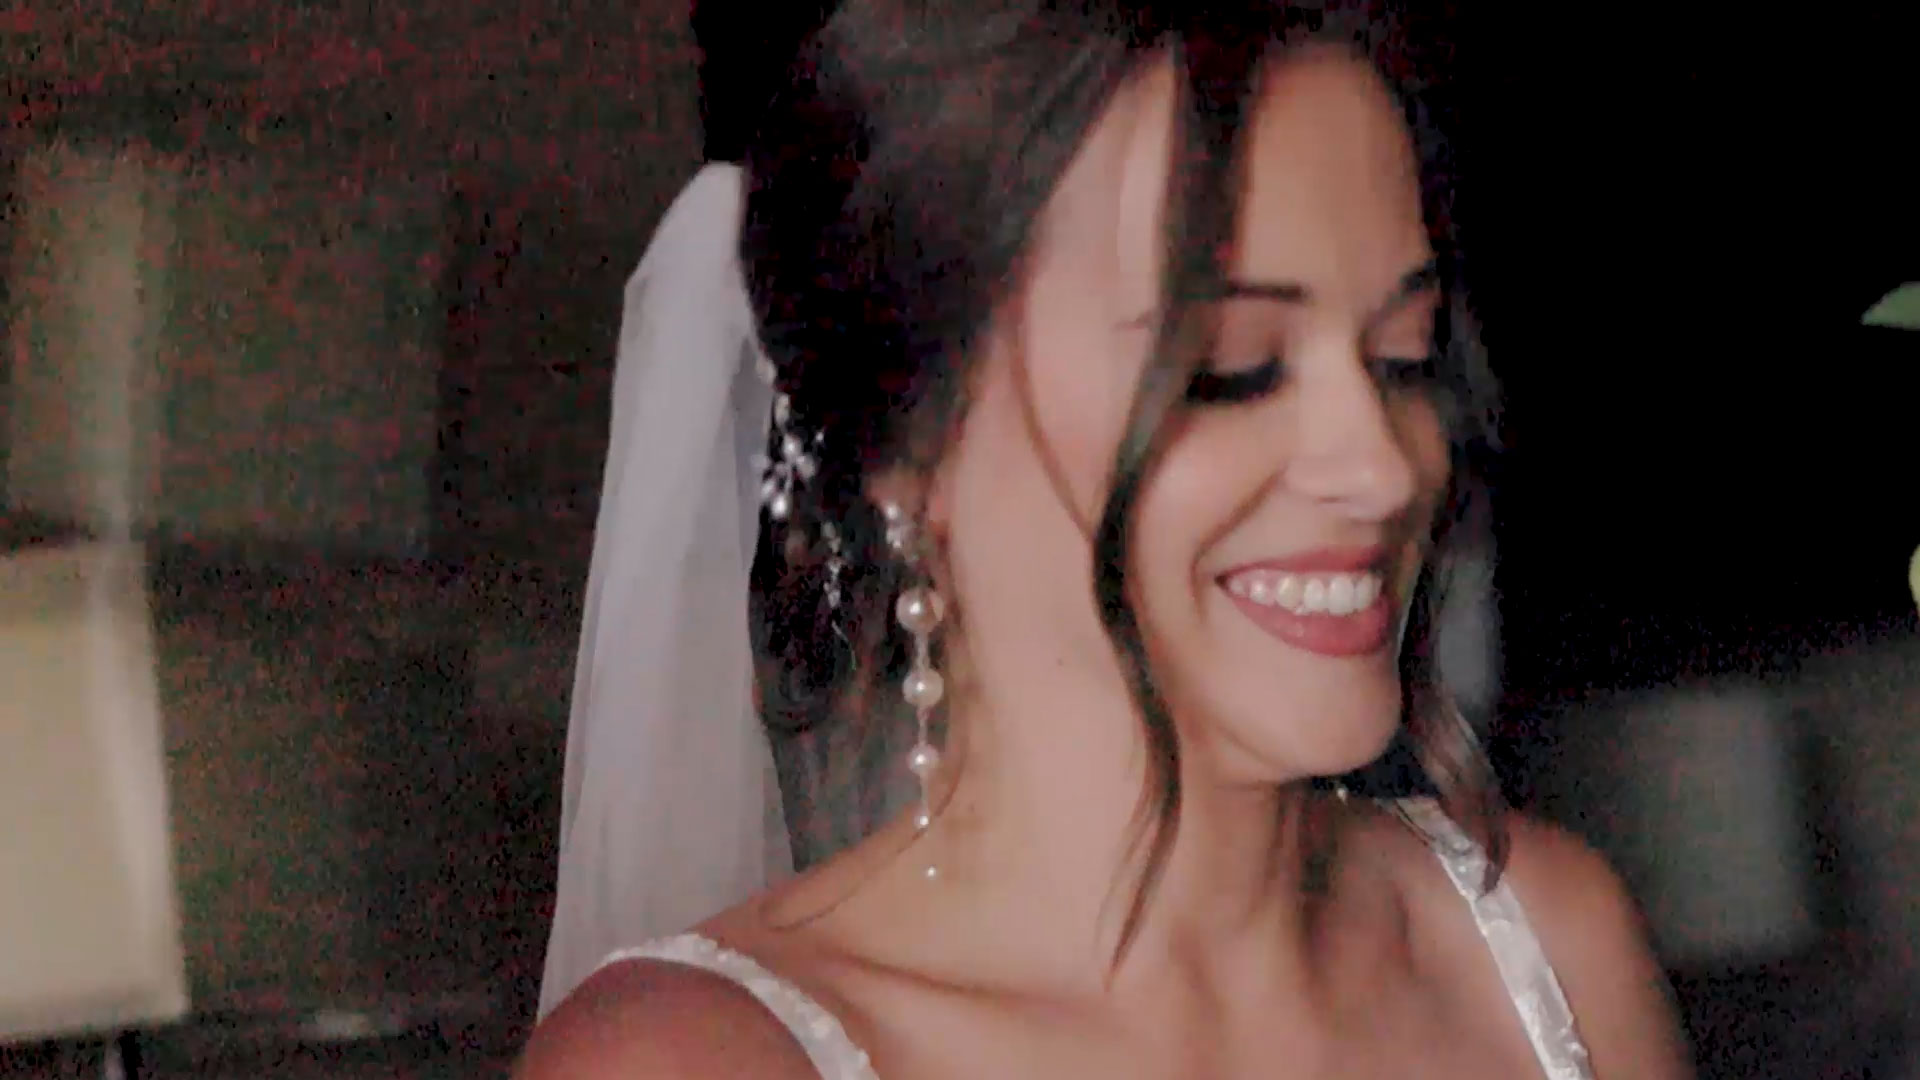
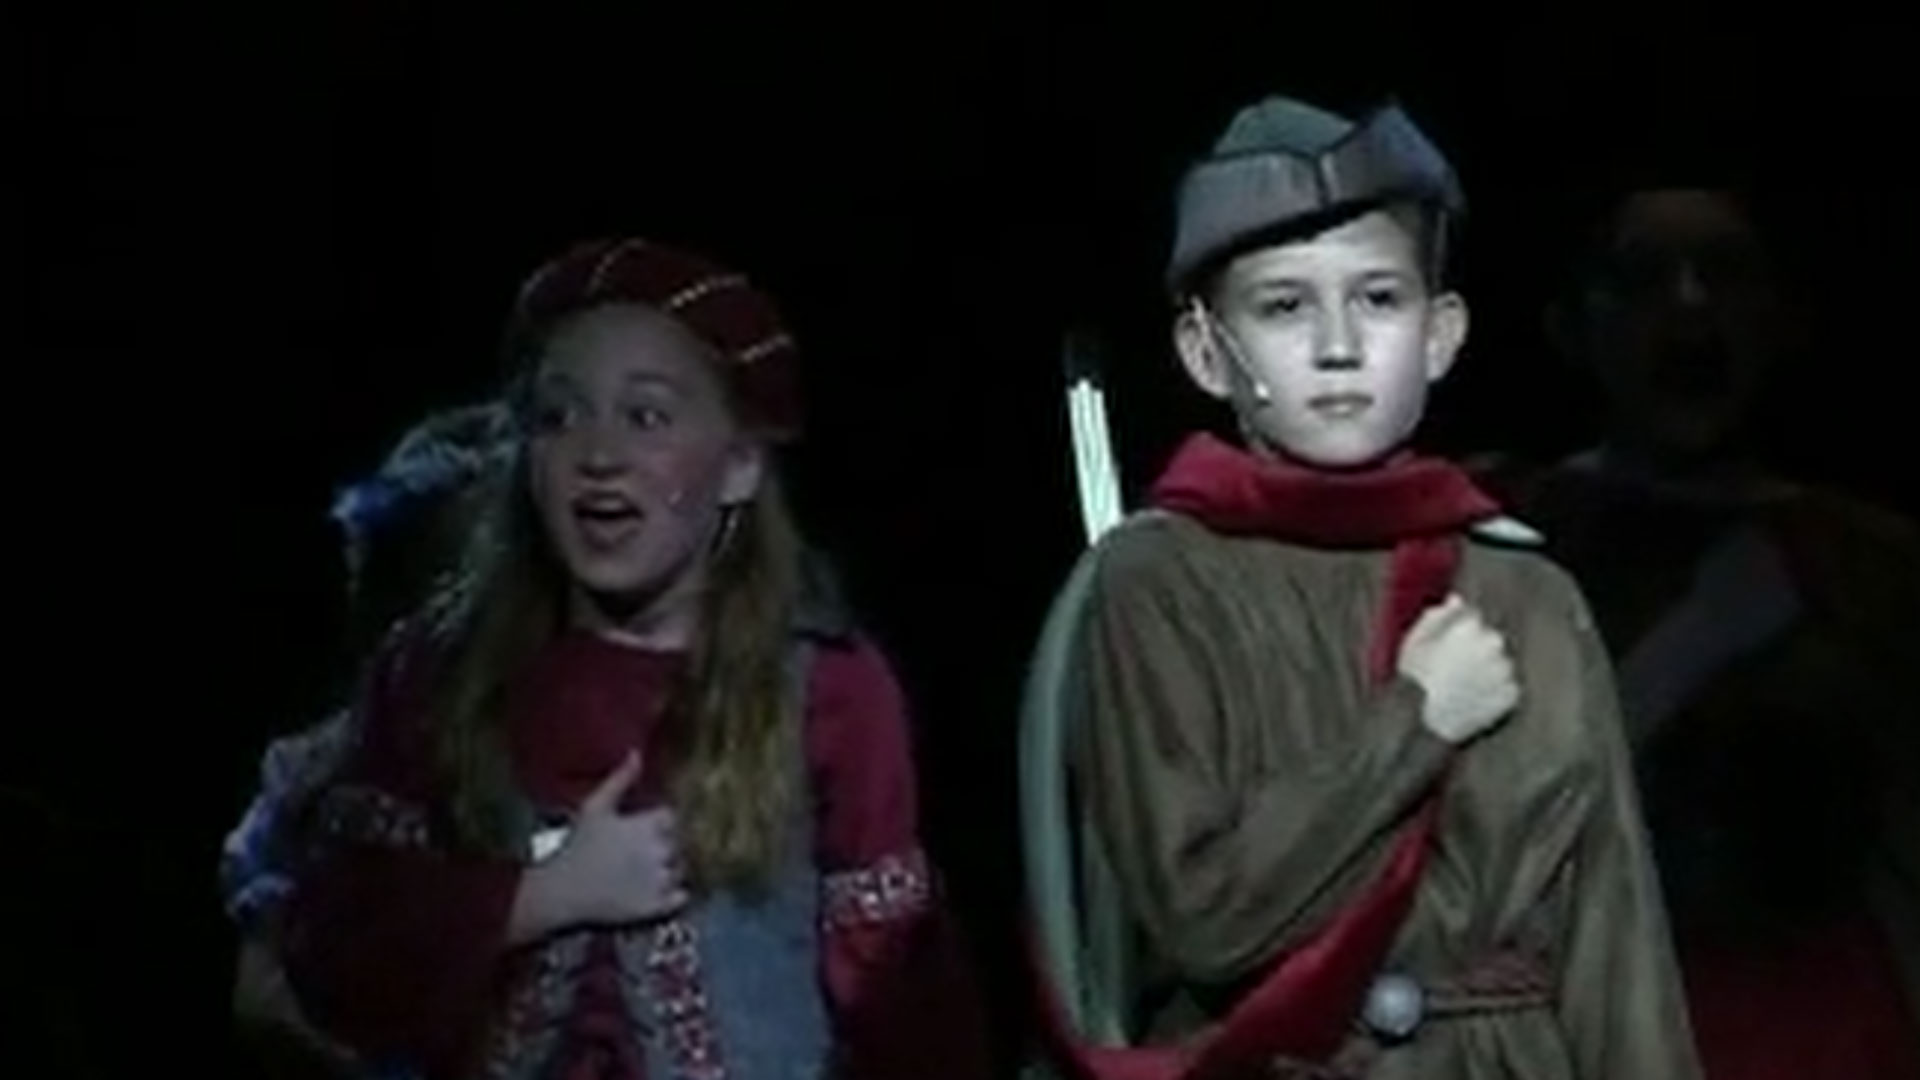
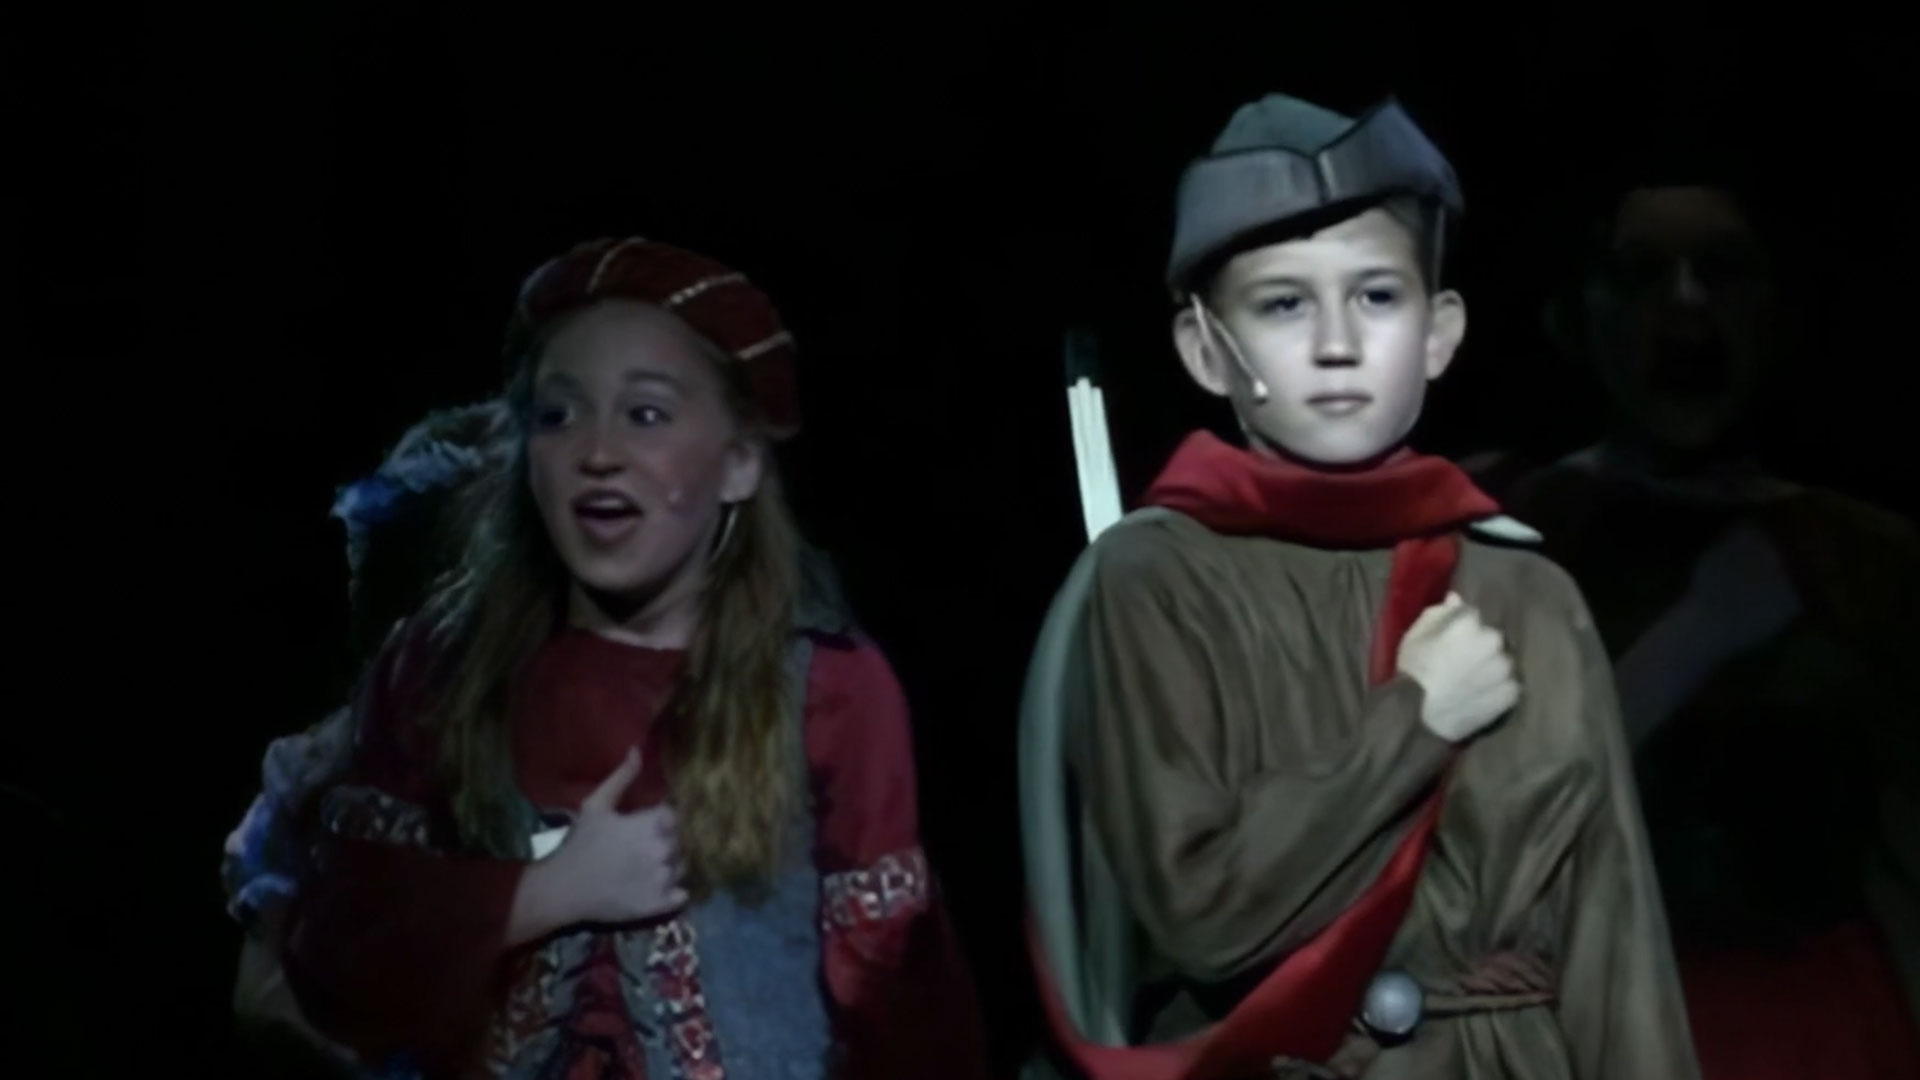
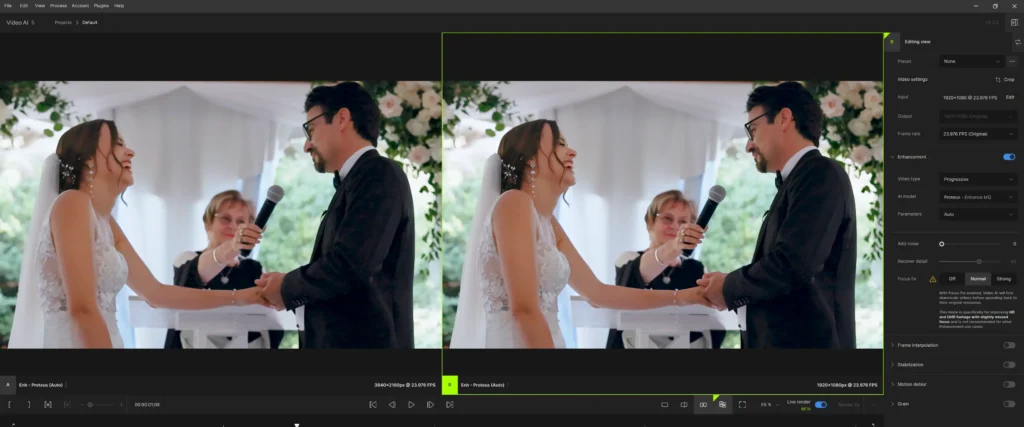
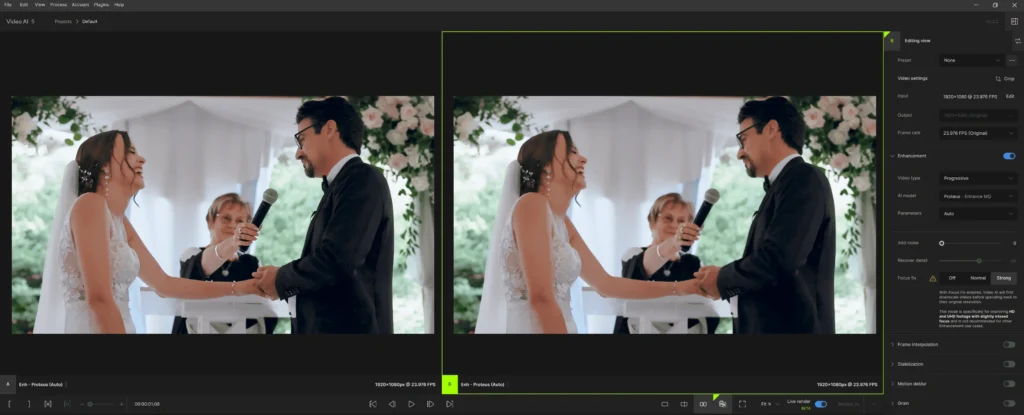
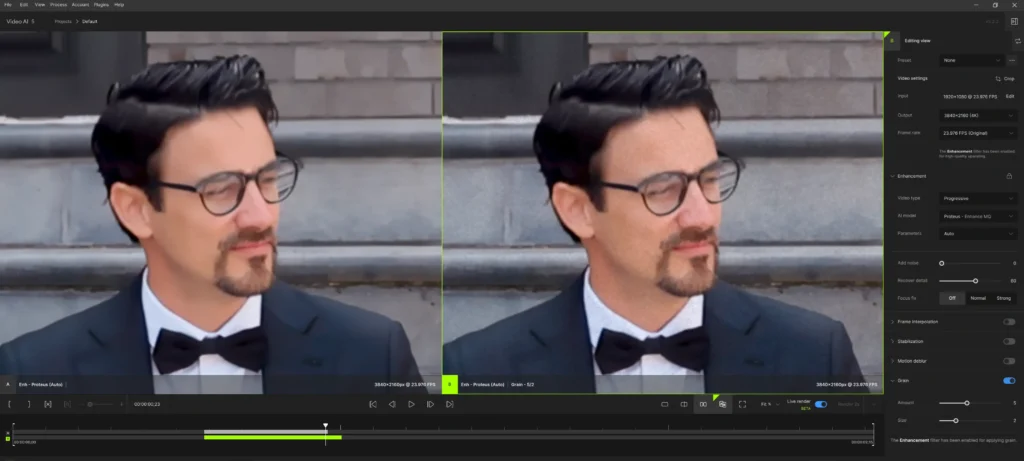
If a clip has focus issues on the main subject, Topaz AI offers the Focus Fix parameter, which can be set to Normal or Strong, depending on the level of blur. In the example, the image on the left shows no Focus Fix applied, while the image on the right shows the Normal setting applied. As you can see, the couple is now in sharper focus. The changes are subtle but noticeable. However, when the Strong setting is used, the couple becomes overly “soft” or blurry. In the screenshot, the left side shows the Normal setting, and the right side shows Strong.
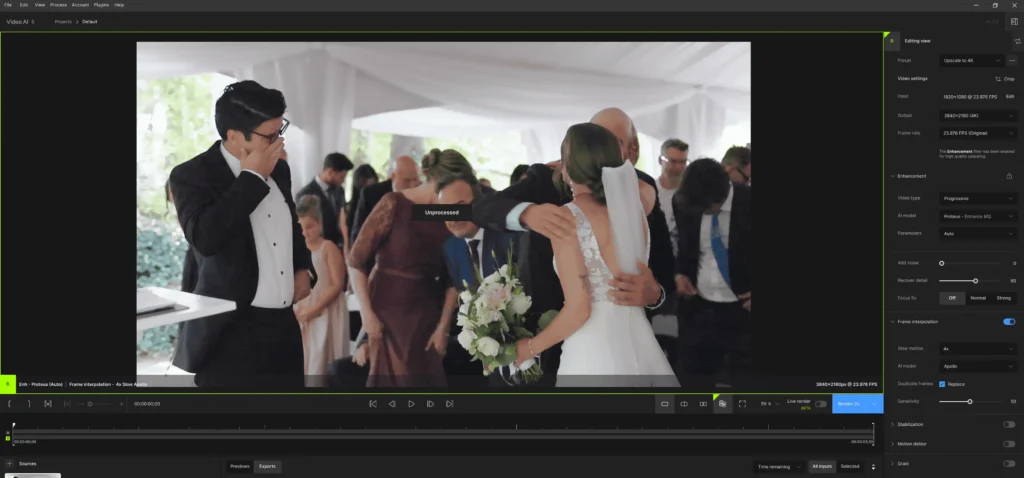
We can also apply Frame Interpolation for slow-motion effects when necessary, but this usually requires experimenting with different AI models from clip to clip. The clips and video quality can vary from one video to another, so it’s difficult to determine the ideal method right away.
In the examples below, we tested slow-motion at 2x and 4x speeds. As seen in the examples, during the movement of the groom’s legs, a slight “trail” remained, indicating that careful attention was needed when selecting the best method for each clip. This is particularly important for clips where the subject is moving quickly (e.g., a running person), as not every clip will suit this method of slow-motion.
Fine-Tuning Each Frame
The functions Stabilization, Motion Deblur, and Grain are additional features that are not frequently used in Topaz AI because they are more commonly applied during video editing in programs like Adobe Premiere Pro, DaVinci Resolve, or Final Cut Pro. If needed, we do add these functions to clips in Topaz AI. For example, a stabilization adjustment can be seen below (Example 10, 10.1, 10.2).
In Motion Deblur, distortions can sometimes appear, such as artifacts or pixels in the bride’s hair (Example 11). However, in the Grain function (Example 12), there are no artifacts. This function adds a cinematic grain effect, with two main settings: Amount, which controls the intensity of the effect applied to clips, and Size, which determines the grain size.
We prefer to add grain in DaVinci Resolve, as it offers more settings and a more creative process for applying the effect. This allows for greater control and flexibility in achieving the desired cinematic look.

We use the Grain function in the third step of the process, specifically in DaVinci Resolve, because it offers various Film Grain options that provide more creative possibilities for your video. The grain effect can be sourced from 8mm or 35mm film, and these differences can dramatically alter the visual perception of the video. By adjusting the type of film grain, we can enhance the cinematic quality, making the footage feel more authentic and visually appealing.
Our Process, Part 2: Video Upscaling in DaVinci Resolve
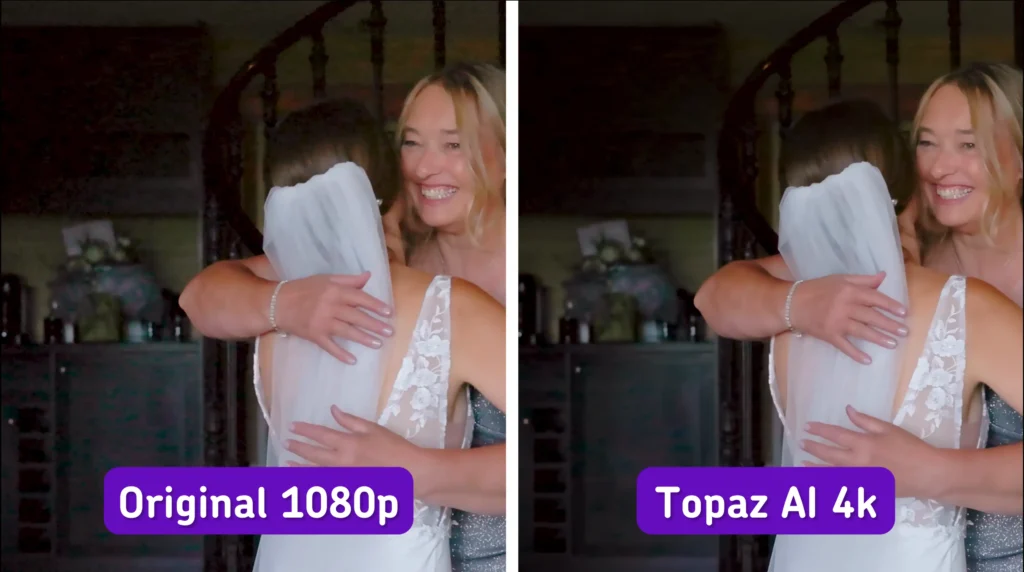
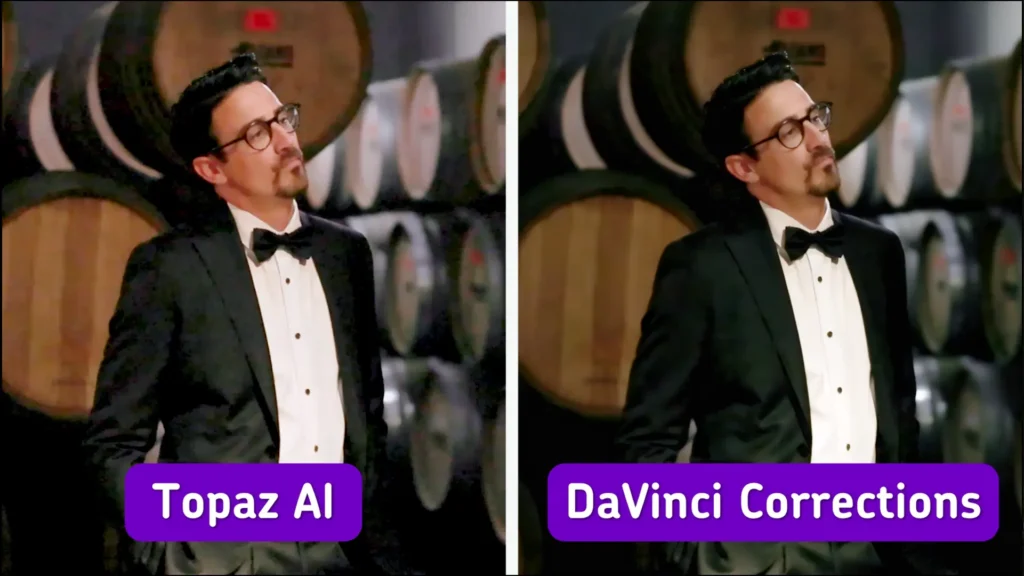
After individually exporting each clip from Topaz, we loaded them onto the timeline in DaVinci Resolve, maintaining the original sequence in which they were edited. At this stage, we also reviewed how well Topaz AI performed and compared the results to the original footage to assess how much the quality improved. As seen in the example, there is significantly less noise, and the program has added pixels, making the image noticeably sharper.
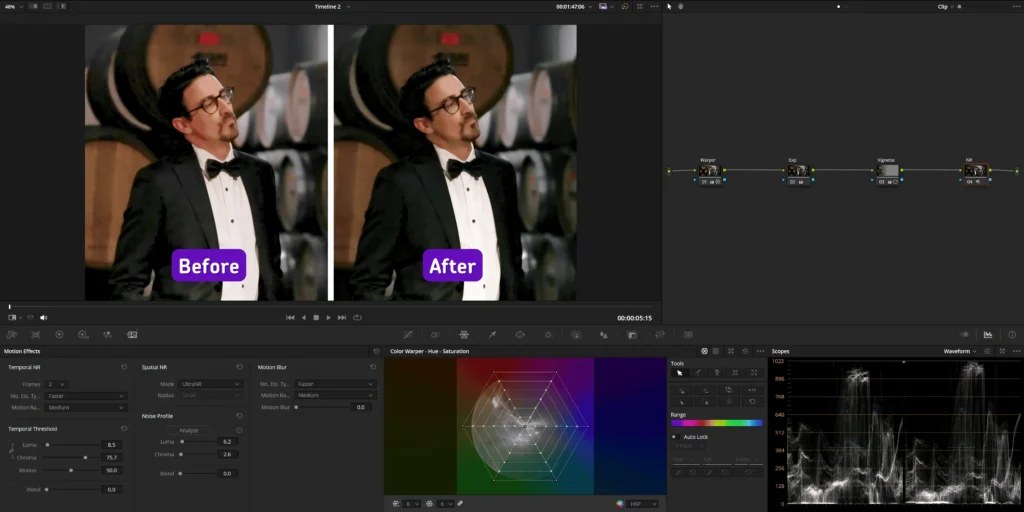
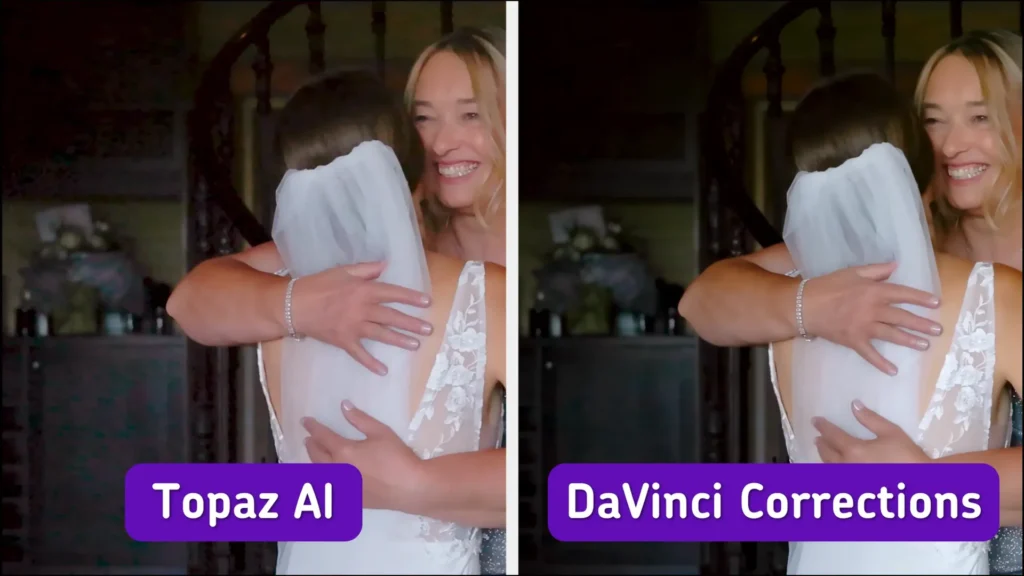
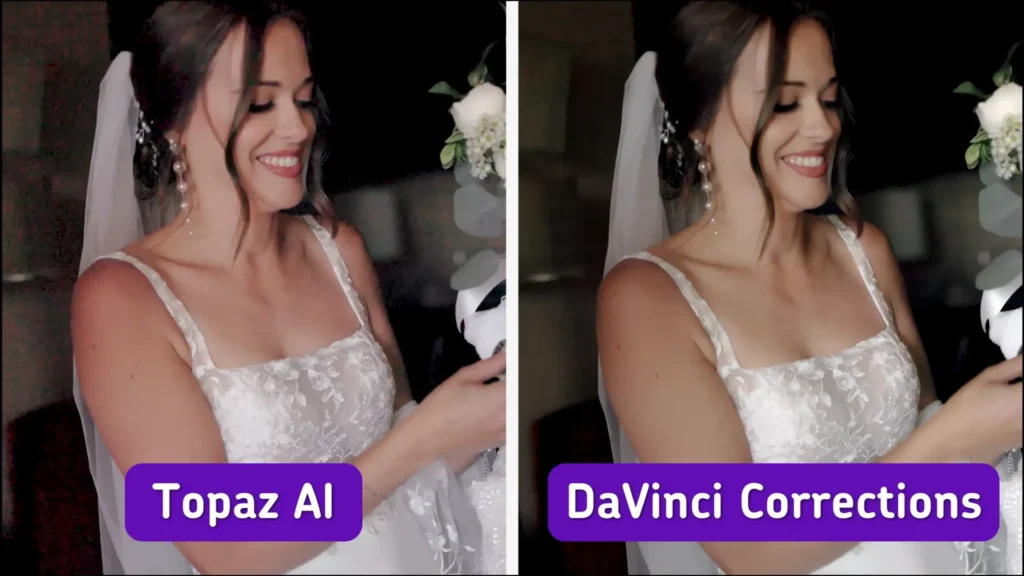
While reviewing each clip, we made adjustments to certain aspects that can only be corrected in DaVinci Resolve, such as tweaking white balance or skin tones.
For instance, in Example 14, we adjusted the gamma to reduce background noise, applied additional Noise Reduction, and corrected the skin tone so it wasn’t as pink. We also added a bit of sharpness to prevent the image from looking too soft or blurry. The same adjustments were made in Examples 15 and 16.
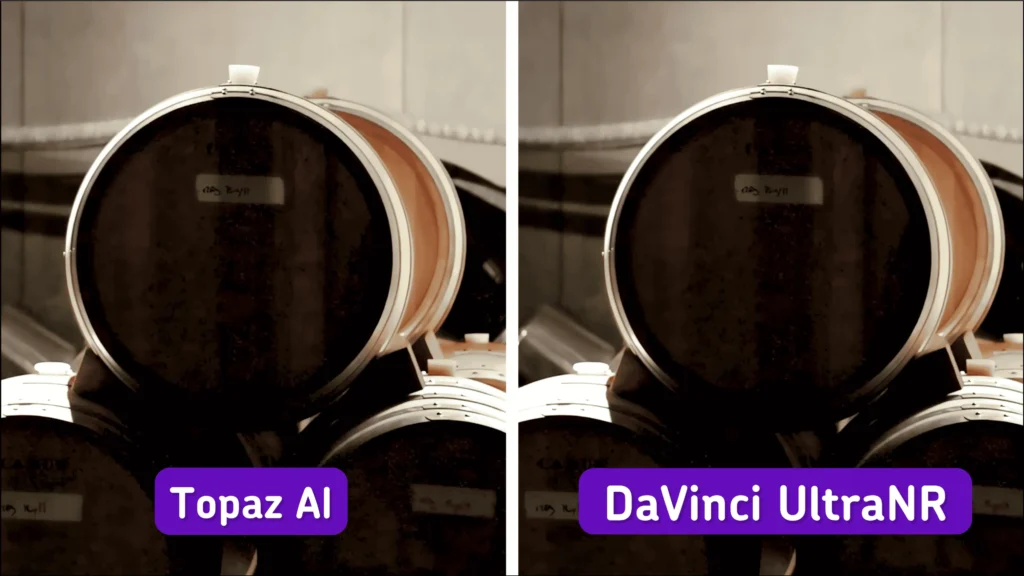
If additional noise reduction was required for a clip that Topaz AI couldn’t fully handle, we took care of it in DaVinci Resolve using the new UltraNR method.
Blackmagic Design, the makers of DaVinci Resolve, describe the UltraNR as a new “DaVinci Neural Engine-driven denoise mode in the Color page’s spatial noise reduction palette. It can dramatically reduce digital noise from a clip while maintaining image clarity. When combined with temporal noise reduction, it becomes even more effective for denoising images with motion.”
You can find more information about this feature in their official update.
We also used the new SuperScale feature in DaVinci Resolve 19.
Blackmagic Design described it as a “upscaling algorithm that creates new pixels when increasing the resolution of an image. The newly generated data contains more detail in upscaled images than standard resizing controls. It is ideal for scaling archival footage into modern resolutions or upscaling HD footage to match a 4K or 8K project.*
You can find more details on their official site.
We used SuperScale as an additional step if the image could have benefitted from even more sharpness and clarity. Although this feature was only recently introduced and we haven’t seen dramatic improvements beyond what Topaz AI delivers, we are exploring all available methods to achieve the best possible video quality with the tools at our disposal. It’s also important to note that it only works with NVIDIA RTX Series graphics cards.
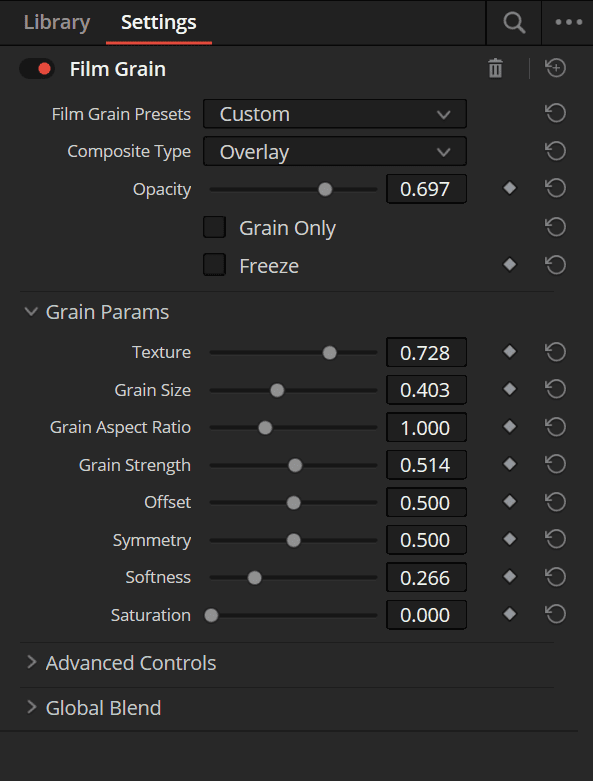
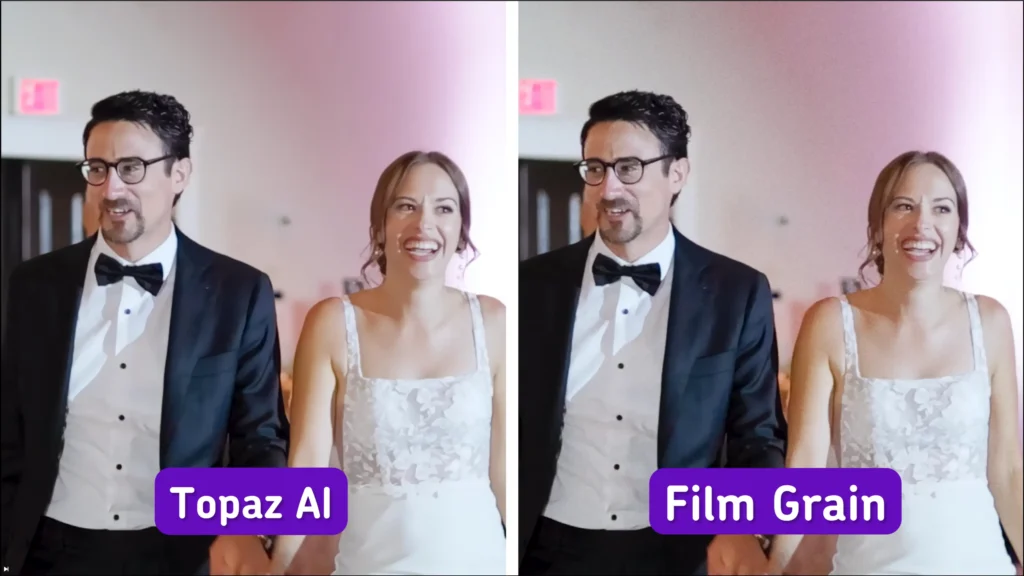
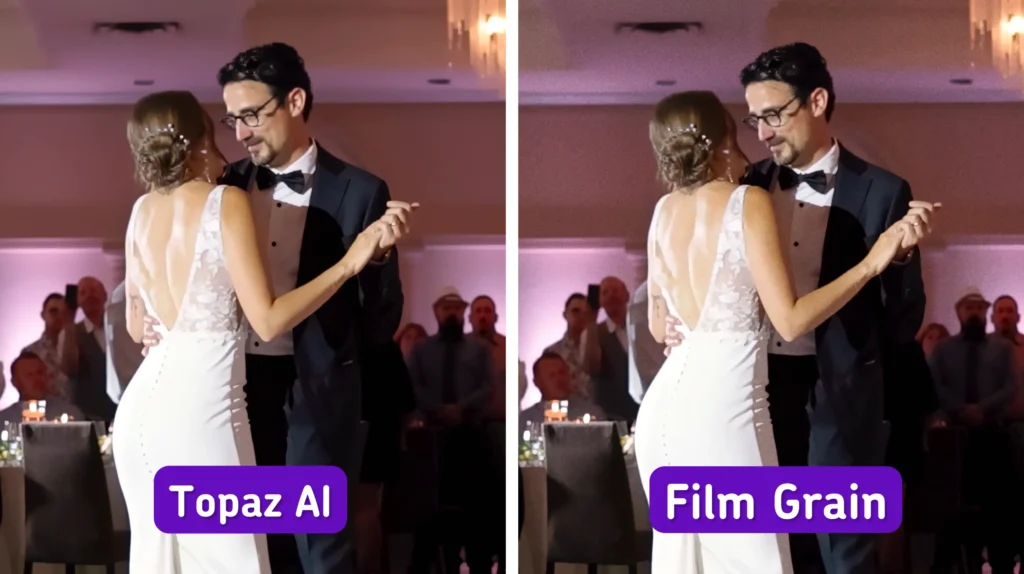
As mentioned earlier, we also applied the Film Grain effect at the end of the process in DaVinci Resolve. This effect is especially useful for preventing the image from looking too “soft” or overly smoothed. Film Grain adds a cinematic and natural texture to the video, helping avoid an overly artificial look.
Below is an example with the Film Grain settings, showing the “before and after” results of applying this effect.
The Final Video
The final step in the AI upscaling process is reviewing each frame again for quality control and making any necessary adjustments. After that, we export the video and check its quality on several devices, including a monitor, smartphone, and TV, to ensure it meets our standards. Once everything looks good, we deliver the final video to the client!
Our client was in awe over the final result.
Outsource Your AI Upscaling to Bride&Groom.video
Artificial intelligence is making it possible to breathe new life into old wedding films. But just because it’s possible, doesn’t mean it’s easy. As this case study shows, the process is complex and requires a lot of trial and error. Bride&Groom.video is at the forefront of this new technology, and would love to AI upscale your videos on your behalf so you can focus on your videography business.
Send us a message today to get a price quote.
Reviewed by: Michael Guastamacchio, Co-founder of MediaZilla
—
FAQs
Will an upscaled wedding video look identical to one shot natively in 4K?
No, and it’s fair to know that upfront. AI upscaling predicts and adds pixels that were never recorded, which produces a much sharper image but not a true 4K capture. Watching the restored film next to the blurry original, the difference is striking; compared side by side with native 4K footage, a trained eye can still tell.
I only have the final exported video, not the raw footage. Can it still be upscaled?
It can. A finished wedding film gets cut back into its individual clips, and each clip is enhanced with settings suited to its lighting and movement before everything is reassembled. Original camera files would give a higher starting point, but plenty of restoration work happens from nothing more than the delivered video a couple still has.
What if the upscaled footage looks too smooth, almost plastic?
That waxy look comes from noise reduction and pixel prediction stripping natural texture along with the grain. The fix is adding film grain back at the end of the grade, which restores a cinematic feel, especially with 8mm or 35mm style grain. It’s also a sign the footage needed clip-by-clip settings rather than one preset across the whole film.
—
Terminology
AI upscaling – a technique where software analyzes a video and generates new pixels to raise its resolution, for example turning 1080p wedding footage into 4K. It can make an older wedding film look sharper and more detailed than the original files allow.
Topaz Video – a video enhancement software from Topaz Labs that uses machine learning to upscale footage, reduce noise, and recover detail. Many editors consider it the leading tool for improving older or low-resolution wedding videos.
Frame interpolation – a process where AI creates extra frames between the existing ones, making smooth slow motion possible even if the footage wasn’t shot at a high frame rate. Fast-moving subjects can leave visible “trails,” so it works better on some clips than others.
Noise reduction – cleaning up the grainy, speckled look that appears in video shot in dim light, such as a reception hall. Done carefully, it smooths the image without erasing real detail like skin texture or fabric.
Film grain – a fine, natural-looking texture added to video in post-production to mimic the feel of classic film cameras. After heavy noise reduction or upscaling, a touch of grain keeps a wedding film from looking artificially smooth.
UltraNR – an AI-driven noise reduction mode in DaVinci Resolve that removes digital noise while keeping the image crisp. Editors reach for it when standard tools can’t fully clean up a difficult clip.
SuperScale – DaVinci Resolve’s built-in upscaling feature, which generates new pixels when enlarging footage to 4K or 8K. It requires an NVIDIA RTX graphics card and works as an extra sharpening step alongside dedicated upscaling software.