New to LUTs? This one starts from scratch, explaining what a Look-Up Table is and where it slots into a color workflow. It shows how a LUT can convert log footage to a standard color space or stamp a stylized mood on a shot, untangles 1D versus 3D LUTs, and notes how one shared LUT helps footage from different cameras match. Importing them into DaVinci Resolve gets a walkthrough too. A gentle entry point for editors finding their feet with color.
Would you like to create a nostalgic or romantic atmosphere in your film? Or a more futuristic or mysterious look? The easiest and most popular way is to use Look-Up Tables (LUTs).
LUT, short for Look Up Table, is a color conversion table. It dissects color codes and outputs the corresponding values. LUT tables are handy for managing saturation and contrast or giving a complete color makeover to a shot.
LUTs are commonly used to create and save color scales, giving the footage a unique style. They can be of different types and serve various purposes, for example, some LUTs are designed to convert logarithmic images to standard recursive color spaces (e.g., S-Log to Rec.709), while others may be used to stylize video, infusing it with a particular vibe or mood.
Here are examples of how a LUT transforms and color grades the appearance of video footage.

In post-production, using LUTs can markedly speed up the color grading process, especially if you have a predefined style or visual concept you aim to realize. Rather than manually tweaking every parameter, you can just apply the right wedding LUT, for example, from Gamut, and then meticulously adjust the picture according to your preferences.
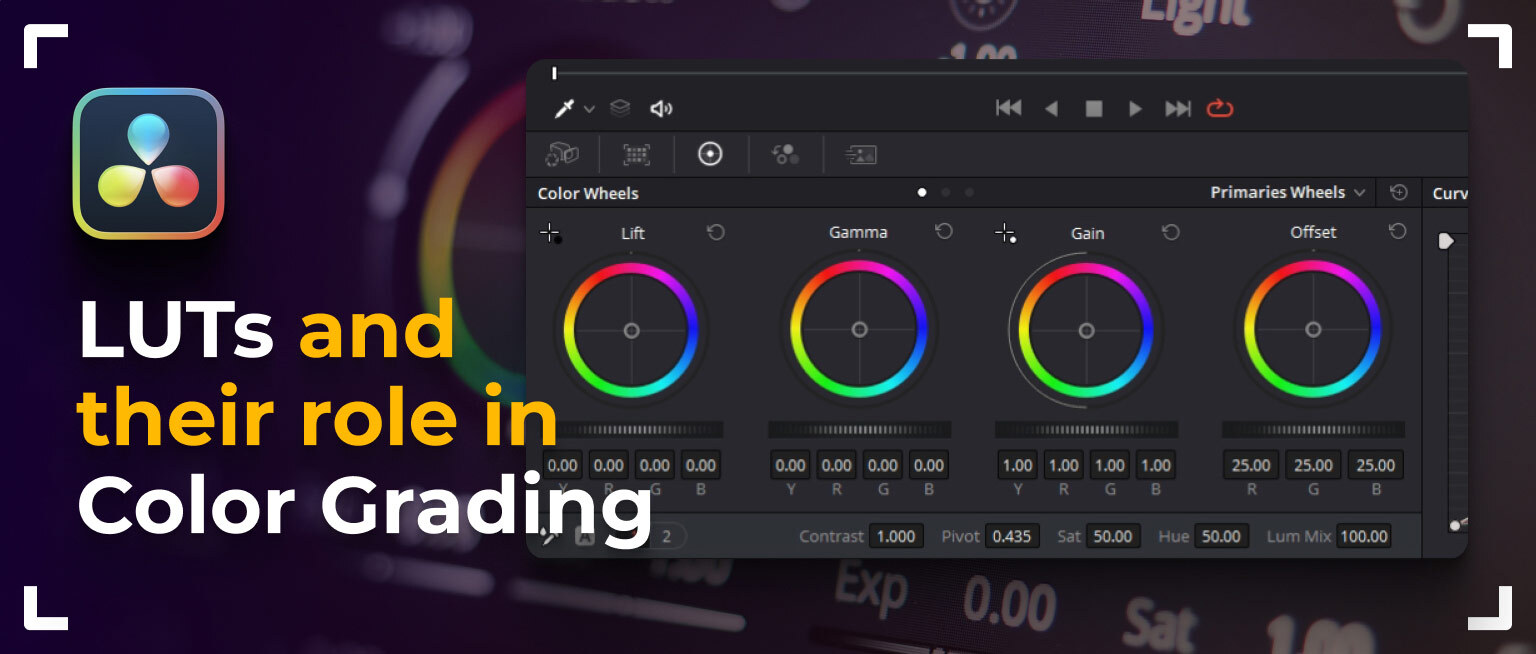
Advantages of Using LUTs in DaVinci Resolve
Utilizing LUTs allows for a rapid and efficient color grading process in videos, reducing the necessity of manually tweaking each parameter. This proves especially beneficial in tight deadline scenarios or when aiming for a uniform color treatment across several clips. LUTs ensure a standardized approach when dealing with diverse sources. In other words, applying the same LUT to footage captured on different cameras can facilitate achieving a cohesive look.
LUTs can be effortlessly shared and distributed among many people, streamlining and enhancing collaboration across different team members.
1D and 3D LUTs
1D and 3D LUTs represent the two primary types of LUTs, each serving unique purposes and possessing distinct characteristics. Here are their key differences:
| 1D LUT | 3D LUT |
| It functions as a one-dimensional table, impacting each color channel (red, green, blue) independently. Generally, a 1D LUT is employed for adjusting the tones (brightness) of a clip. | It possesses a three-dimensional structure, enabling the simultaneous consideration of interactions among all three color channels. A 3D LUT can fine-tune the color balance, saturation, and contrast of a clip in a more sophisticated manner compared to a 1D LUT. |
| Usually, it has fewer data points and is less intricate. It can be perfect for straightforward corrections, like linear transformations. | It has more data points and can perform more intricate color transformations. This makes 3D LUT more preferred for tasks demanding precise color correction, such as converting from one color space to another. |
| Often used to convert logarithmic curves to linear or to perform basic contrast adjustments. | It is perfect for styling clips, converting color spaces, and performing intricate color corrections that consider the relationships between various color channels. |
Depending on the specific tasks and project needs, you can opt for either 1D or 3D LUTs. It’s crucial to highlight that both types can be utilized together in a comprehensive color correction pipeline.
How to import LUTs into DaVinci Resolve
Now that we understand 1D and 3D LUTs, let’s proceed to the process of incorporating them into DaVinci Resolve. When opening the project, there’s no need to jump straight to the Color tab. Instead, we open Project Settings and navigate to the Color Management window.
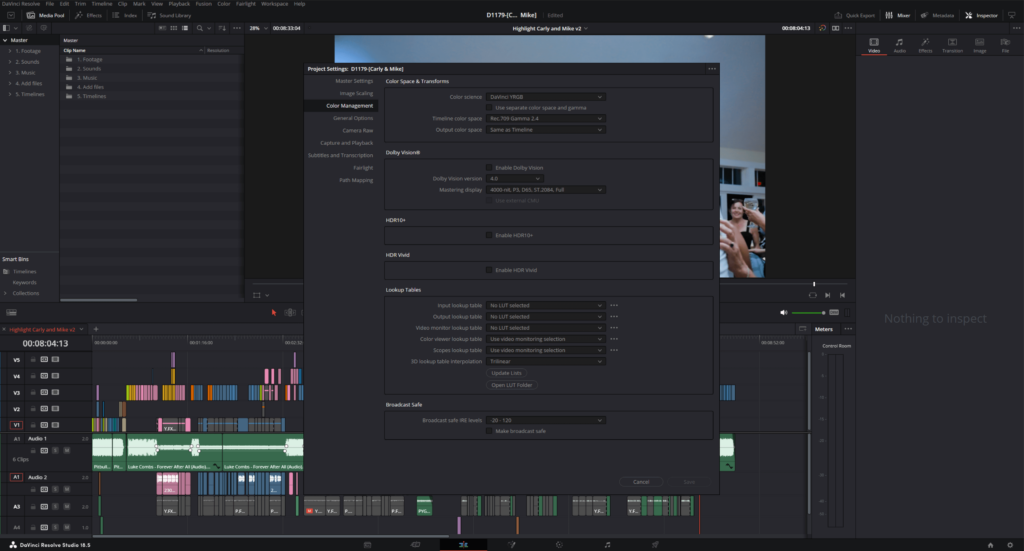
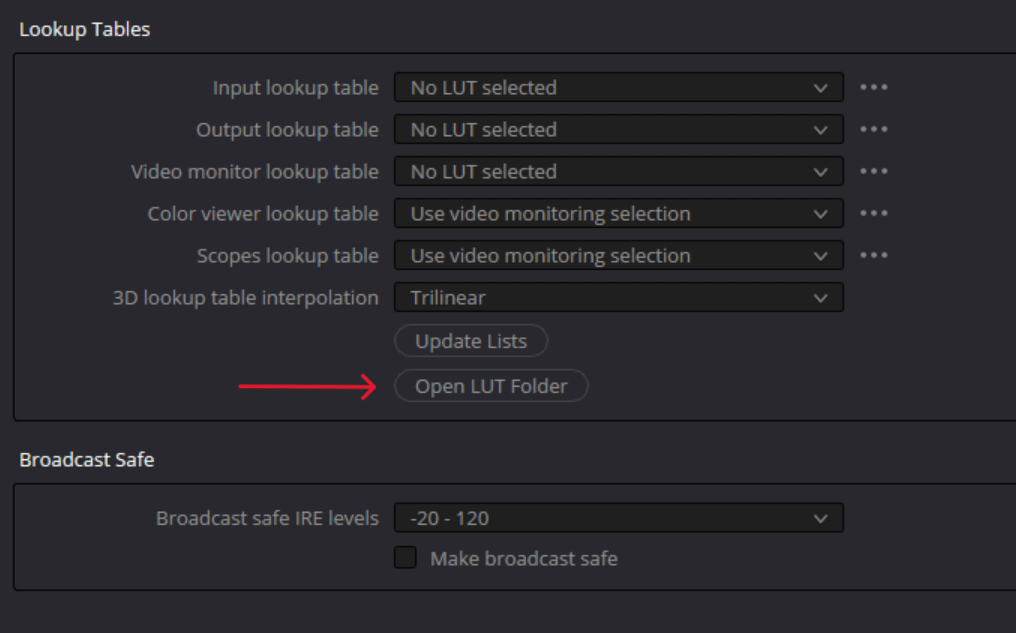
In this window, go to the “Lookup Tables” section and click the “Open LUT Folder” button. Now, a folder will open in Windows Explorer or Finder (for MacOS users). This is the directory where all the LUTs for DaVinci Resolve will be stored.
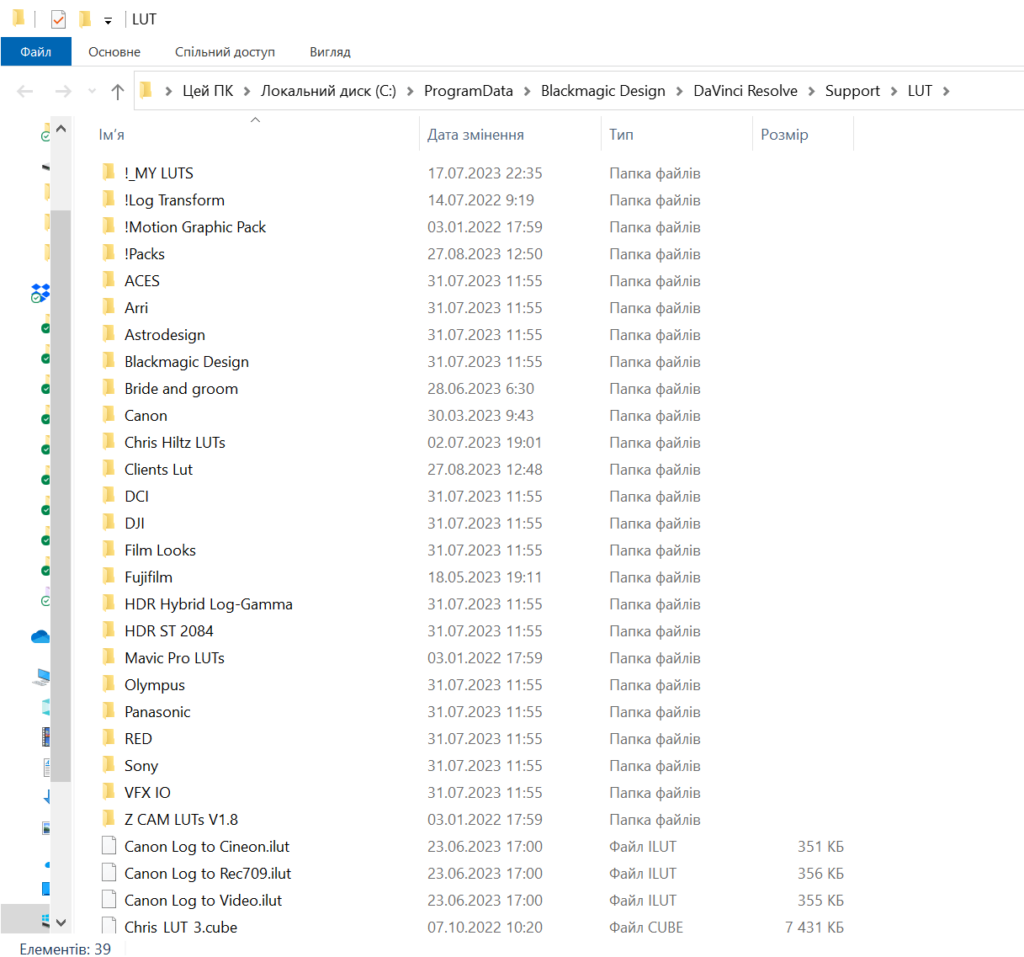

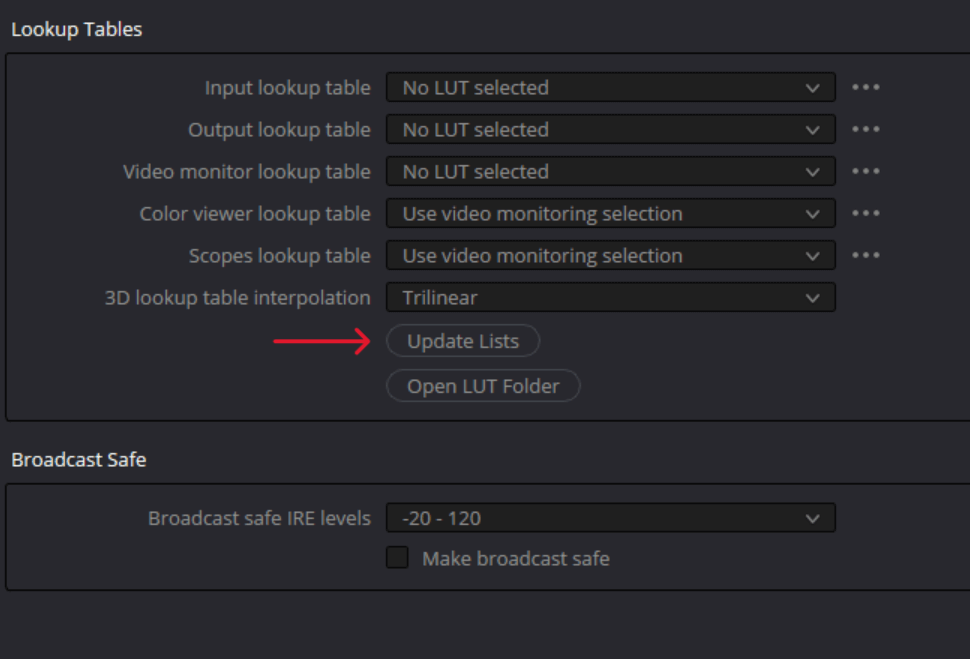
The next step is to add LUTs to the folder we opened. We recommend copying them to ensure you always have backups on your disk in case of a system failure. After completing the copying process, close the File Explorer folder. Don’t worry, your data is saved in it. To make the LUTs appear, there’s no need to restart your project; just click the “Update Lists” button.
Now your LUTs are uploaded into the program. To ensure everything is in order, navigate to the Color tab and open the LUTs window. You’ll find a list of the added LUTs on the left.
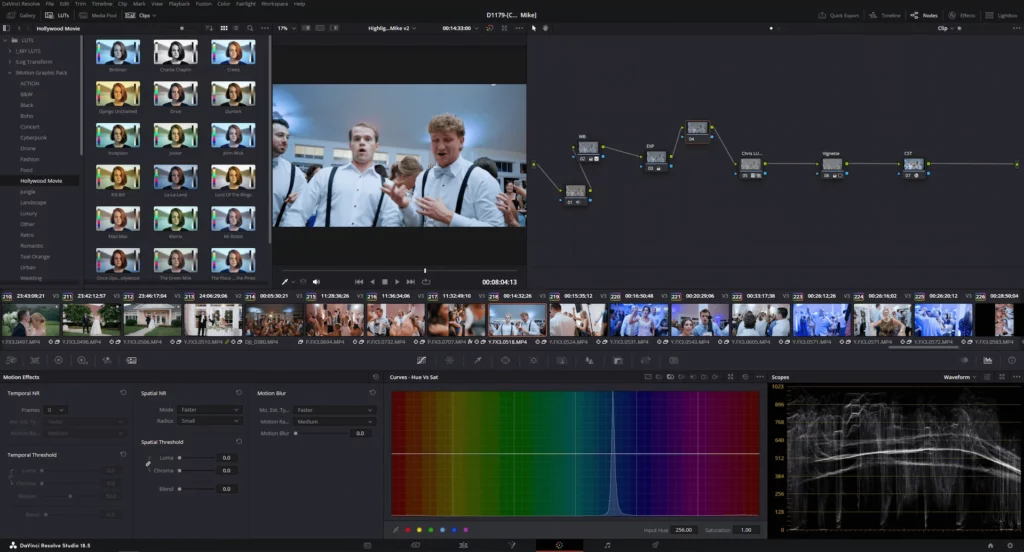
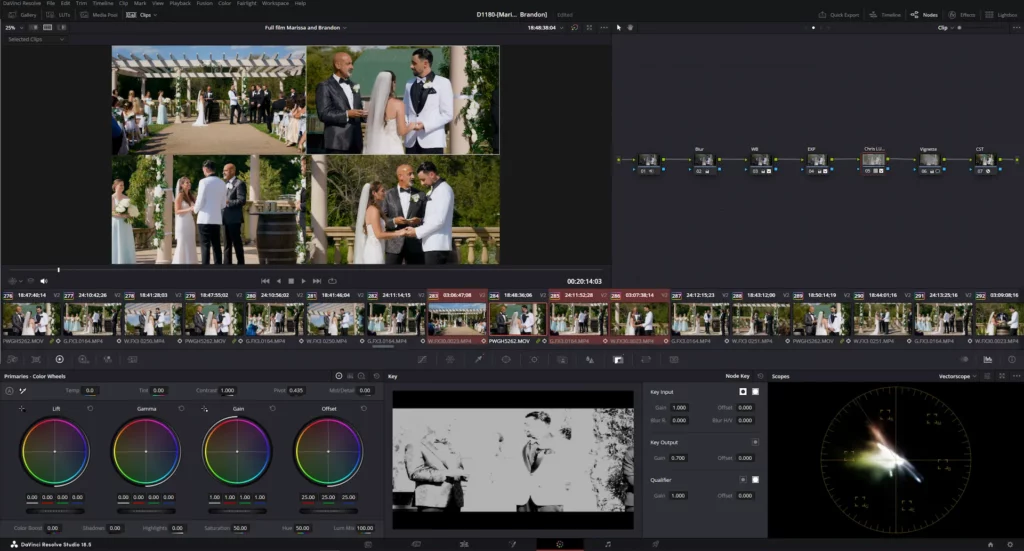
To incorporate your LUT (whether 1D or 3D) for the chosen clip, start by creating a node (if it’s not already in the workspace) using the shortcut Alt+S. Double-clicking on the LUT will then automatically add it to our highlighted node. The LUT is exclusively added to the selected node with a double click. To add a LUT to a non-selected node, simply drag it onto the desired node.
The degree of the LUT application is located in the Key tab. Here, we utilize the knob named Gain (Key Output).
Organizing and managing LUTs is a key element of the color correction process, allowing for time optimization, enhanced efficiency, and achieving more professional results.
- Folder structure: Establish structured folders for different types of LUTs or various projects. For instance, you might have folders labeled “Technical LUTs,” “Stylizing LUTs,” or “XYZ Project LUTs.”
- File Naming: Use consistent and clear names for your LUTs to identify their function or style quickly. For example, consider names like “Rec709_to_SLog3.cube” or “Warm_Sunset_Look.cube.”
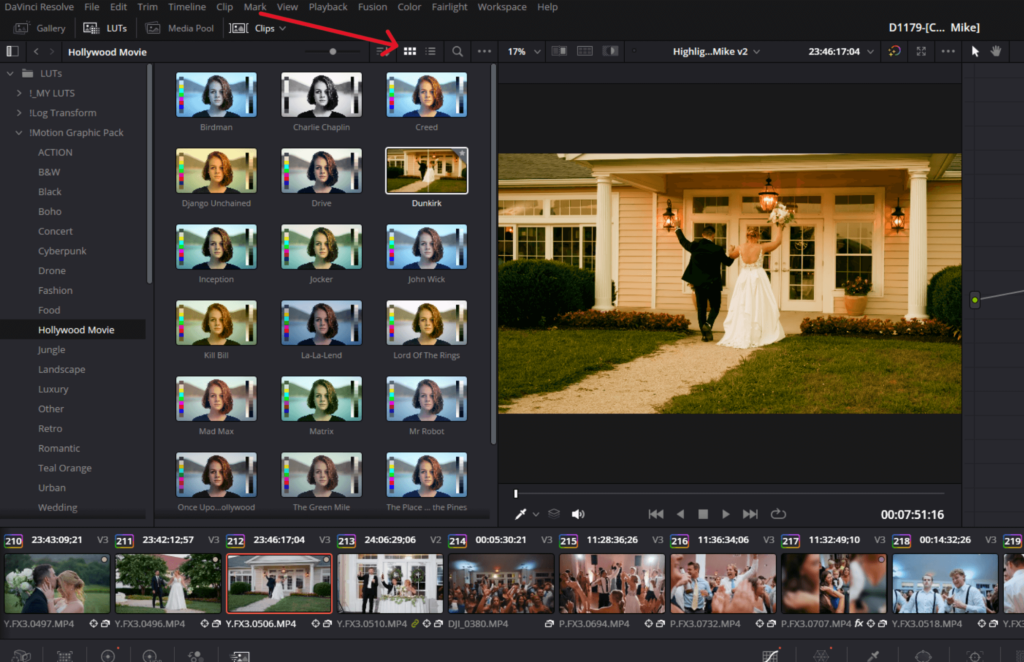
- Previewing: Take advantage of software or built-in preview features for a glance at the LUT’s effect on a sample image, saving time on unsuitable LUTs. In DaVinci Resolve, the built-in preview activates when hovering over a LUT, with the “tiles” mode enabled, not the “list” mode.
- Consistently back up your LUT library on external drives or cloud services to safeguard your data.
- Over time, certain LUTs may become obsolete or unused. Conduct regular reviews of your library, deleting outdated or ineffective LUTs.
An organized and well-structured LUT management system enhances the color correction process, preventing errors associated with selecting or applying inappropriate LUTs.
In conclusion
LUT (Look-Up Table) is a powerful tool for videographers and color grading experts, enabling the transformation and stylization of footage. However, its effectiveness relies on proper and deliberate application. Misusing LUTs can distort or degrade clip quality, whereas applying them correctly can elevate your films to a professional standard.
It’s crucial to bear in mind that LUTs are just one element in the color grading process. While they can greatly streamline and accelerate this process, it’s best to utilize them in combination with other tools and techniques. Therefore, ongoing learning, experimentation, and a grasp of the principles of working with LUTs ensure the attainment of exceptional, professional results in your video.
Ready to make your wedding videos truly unforgettable? Explore our wedding video editing services and let us bring out the beauty, romance, and emotion in every shot.
—
FAQs
If I buy good LUTs, is my color grading basically done?
A LUT gets you a strong starting point, not a finished grade. Wedding footage shifts with every location and lighting change, so each clip still needs its own exposure, white balance, and saturation attention after the look goes on. Where LUTs earn their price is speed and consistency: the style lands instantly, and your effort goes into refining rather than building from zero.
Should I learn to build my own looks or just work with purchased LUTs?
Start with purchased ones and let them teach you. Working inside well-made wedding LUTs shows you what choices create a mood, and the manual adjustments each clip demands build your grading instincts anyway. Once you consistently find yourself fighting a LUT toward the same destination, that destination is your style, and that’s the moment building your own look starts making sense.
—
Terminology
LUT (Look-Up Table) – a color conversion file that remaps the colors in footage to create a specific style or mood in one step. Wedding editors use LUTs to speed up color grading and keep a consistent look across clips from different cameras.
1D LUT – a simpler type of LUT that adjusts each color channel (red, green, blue) independently, mostly affecting brightness and tone. It suits basic corrections like converting logarithmic curves or tweaking contrast.
3D LUT – a more advanced LUT that considers how all three color channels interact at once, allowing precise control over color balance, saturation, and contrast. This is the type used for stylizing wedding footage and converting between color spaces.
Color grading – the creative stage of shaping a film’s color and mood after basic corrections are done. A romantic, nostalgic, or cinematic feel in a wedding video usually comes from this step.
Node – an individual adjustment step in DaVinci Resolve’s color workspace, where corrections and LUTs are applied. Each LUT attaches to a specific node, so editors can stack and control effects cleanly.
S-Log to Rec.709 – a common conversion from a flat camera recording profile (S-Log) to the standard color space that screens are built to display (Rec.709). Technical LUTs handle this translation so the footage looks natural before any creative styling is added.