When a videographer sends footage to post-production, the editor confronts the challenge of working with two or more cameras simultaneously. Beginners often sync the cameras and begin cutting them sequentially. However, this approach is suboptimal as it consumes a significant amount of the editor’s time reviewing footage from each camera. While artificial intelligence can handle multi-camera work, it still requires audio synchronization. In this case, it is worth working in multi-camera mode, and this mode is available in all editing software.
Synchronization of Audio and Video Files
To activate the multi-camera mode, you must first sync the cameras with each other and the separately recorded audio. It’s common for shooters to record audio directly into the cameras using microphones, so pay close attention when reviewing specifications and submitted materials.
Typically, we rely on Premiere Pro to sync video footage with audio since DaVinci Resolve’s audio analysis is not as robust. When dealing with raw audio, like recording from a church, the program faces challenges in analyzing and aligning the recorded audio from microphones and cameras. Premiere Pro excels in audio analysis, providing a much more effective solution. Furthermore, in Premiere Pro, we utilize the Pluraleyes plugin, enhancing the synchronization of audio.
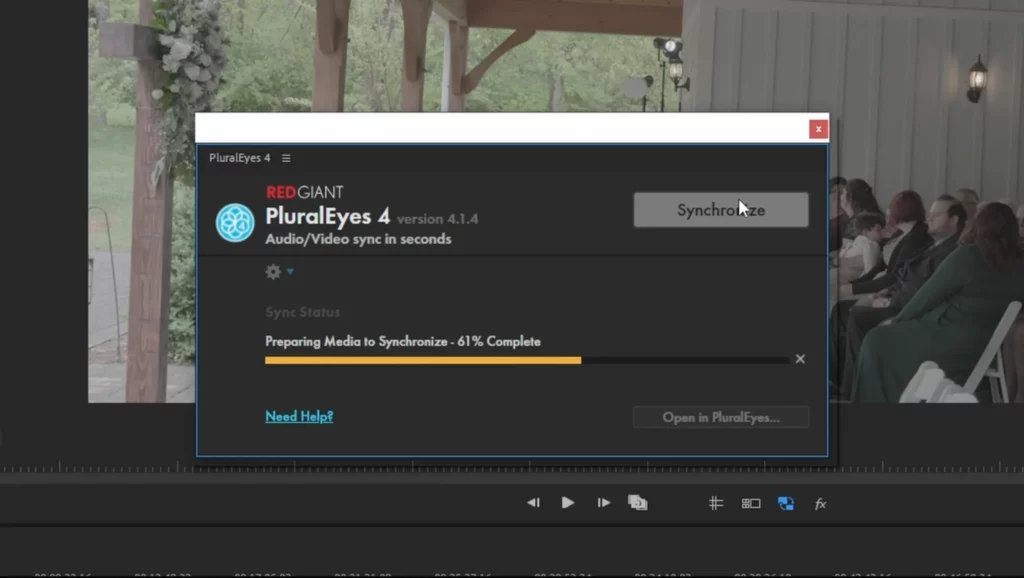
For syncing footage with Pluraleyes, start by dragging the video material onto the timeline, and placing each camera on a new video track. Plan the order in which each camera should be arranged — first, second, and so on. Load the audio onto separate audio tracks. Execute straightforward actions in the plugin to begin synchronization. Click on Window – Extensions, and choose PluralEyes. In the plugin window, hit a single button – Synchronize. Now, await the results.
Multicam in Premiere Pro and DaVinci Resolve
Following successful synchronization, we can see that the plugin has generated a new sequence.
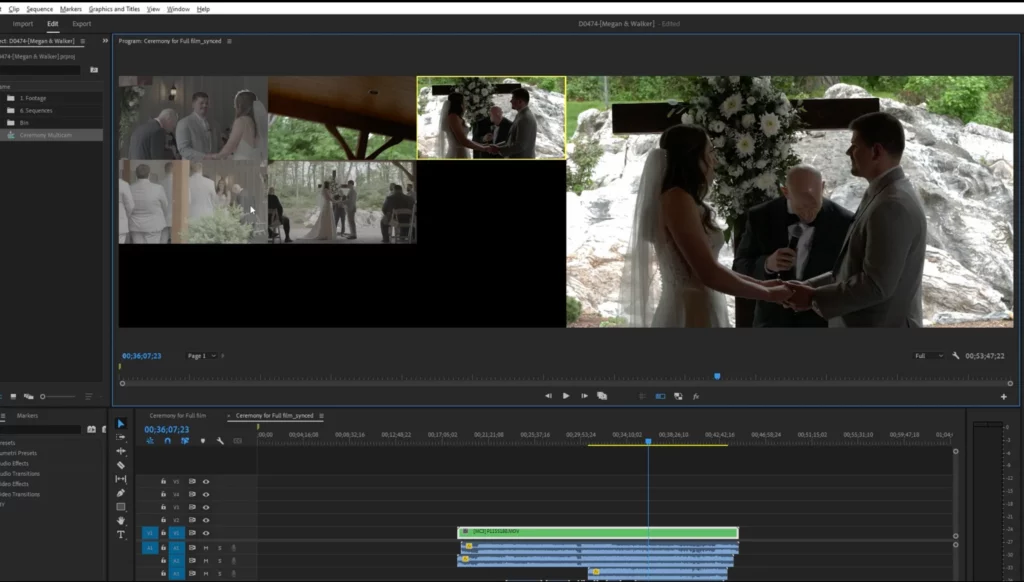
To set up a multi-camera mode in Premiere Pro, we specifically pick the video files, generate a Nested Sequence, then right-click and opt for Enable from the Multi-Camera list. For a simultaneous view of multiple cameras in the viewer, we include the Toggle Multi-Camera View button. Switching between cameras is as simple as pressing the mouse button on one of the cameras. We’ll offer more comprehensive guidance on working with multi-camera setups in a dedicated video.
Let’s consider another approach for setting a multicam configuration in DaVinci Resolve. Following synchronization in Premiere Pro, we pick the sequence for export, then go to File – Export – Final Cut Pro XML. We designate a location on the disk and provide a name for the sequence. In DaVinci Resolve, we launch the project, navigate to File – Import – Timeline, and choose the XML file. We encounter the Load XML window, confirm that all the data is accurate, and then click OK. You’ll observe that all the footage and audio have been successfully loaded.
We’ve placed the video and audio files onto the main timeline. Currently, we are eliminating unnecessary audio from the left and right sides since they won’t be used. Additionally, we are adjusting the color of the audio to prevent confusion with camera recordings. Then we move it to the beginning of the timeline.
To establish a multicam setup, we duplicate the loaded timeline, rename it to “multicam,” right-click on it, and select Convert Timeline to Multicam Clip—indicating that this timeline will be converted into a multicam clip. We drag the multicam clip into the original timeline and substitute the video track with the multicam.
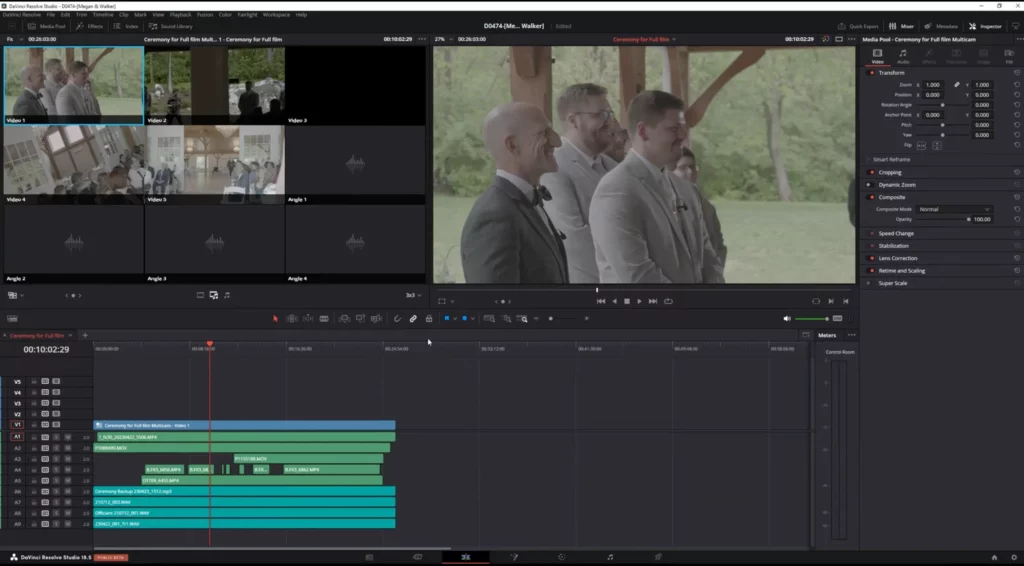
To activate multicam mode, simply click the Dual Viewer Mode button in the Viewer. In the new window, located at the bottom left, choose the Multicam button from the list. To adjust the number of displayed cameras, click the Default button and select 2×2 (2 by 2) if you have 4 cameras. For more cameras, opt for 3×3 (3 by 3), and so forth.
The method for switching between cameras is similar to Premiere Pro. You can use the mouse button, or alternatively, switch cameras using the numeric keys on the keyboard, where 1 corresponds to the first camera, 2 to the second, and so on.
Final thoughts
We know that at first glance, it may seem quite complex, but this approach significantly accelerates the workflow, especially in documentary projects.
—
FAQs
Do my cameras need to record audio if I’m using external recorders anyway?
They do, and skipping it creates real problems in post. Sync software aligns footage by matching waveforms, so each camera needs its own scratch audio for the external recordings to lock against. The camera audio doesn’t have to sound good; it has to exist. Editors usually notice missing scratch audio quickly because it makes syncing much harder.
Is multicam mode worth setting up for just two cameras?
Even at two cameras, yes. Cutting sequentially means reviewing each camera’s full ceremony separately, while multicam mode shows both angles at once and lets you switch between them in real time as the moment plays. The setup takes minutes; the sequential approach costs hours. The gap only widens as ceremonies climb to four or six cameras.
What should I try when sync software fails on certain clips?
Check the audio in the problem clips first, since sync failures usually trace back to weak or missing scratch audio rather than software faults. Raw recordings from echoey spaces like churches are the classic offender. Re-running those clips in a tool with stronger audio analysis often resolves it, and the stubborn leftovers can be aligned manually using a visible waveform spike.
Can AI handle multicam editing without me syncing anything?
Not yet. AI tools can help with the camera-switching side of multicam work, but they still depend on properly synchronized audio underneath, so the sync step stays in the workflow either way. Treat the AI assistance as a layer on top of solid fundamentals: well-recorded scratch audio and a clean sync remain the foundation the whole edit sits on.
—
Terminology
Multicam editing – an editing mode where footage from several cameras filming the same event, like a wedding ceremony, is synced and viewed side by side. The editor switches between angles with a click or keystroke instead of cutting each camera’s footage separately, which saves enormous time.
Audio synchronization – lining up video clips and separately recorded audio so everything plays in perfect time. Editing software analyzes the sound waves from each source, like camera mics and a dedicated recorder, to match them automatically.
PluralEyes – a plugin that syncs audio and video tracks automatically by comparing their waveforms. It handles tricky material, like echoey church recordings, better than built-in sync tools and generates a fully aligned sequence with one button.
Nested sequence – a group of clips packaged into a single timeline item so they can be handled as one unit. In Premiere Pro, it’s a required step before enabling multi-camera mode.
XML file – a file format used to carry a timeline, with all its clips and their positions, from one editing program to another. It’s how a sequence synced in Premiere Pro can be opened in DaVinci Resolve without redoing the work.
Multicam clip – a converted timeline in DaVinci Resolve that bundles all synced camera angles into one clip. Once created, the editor can view up to nine or more cameras at once and switch between them in real time.