As a wedding videographer, you understand the importance of capturing every special moment of your clients’ big day. In our turn, as a wedding video editing company, we understand the importance of creating timeless films that couples can cherish for years to come. As you know, the editing process can be time-consuming and requires attention to every detail, which is why many videographers choose to outsource this task. Our standard wedding film editing workflow takes 14 business days. However, we also understand that sometimes you may need your wedding films to be edited much faster, so you can deliver them to the newlyweds in time.
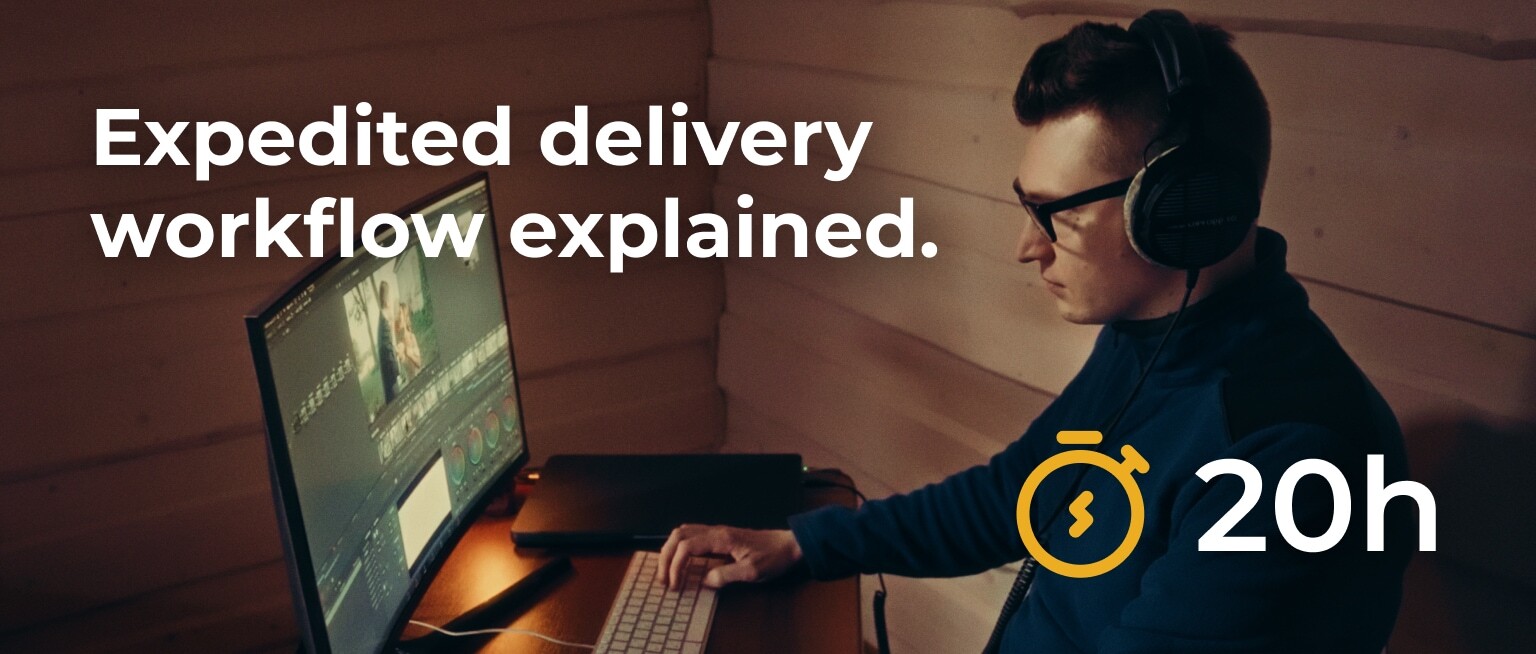
As you might see on our website, we also have an option for an expedited 7-day turnaround. And now we’ve worked out a flow that can allow us to edit highlight videos in only 20 working hours! This means that if you need your wedding video edited urgently, we’ll dedicate a team of experienced editors to work around the clock to deliver your video as quick as a flash.
Here’s how it all works
In our typical routine, the editors’ workflow exudes a sense of comfort and precision. The first step is to start downloading the footage. Then, editors take a leisurely moment to brew a steaming cup of tea or coffee and begin to plunge into the atmosphere of the client’s films, watching the examples of their previous works. Once the files are ready, the next stage begins – watching the footage, pausing intermittently to allow the imagery to sink in. Time is on the editor’s side, affording them ample opportunity to ponder each step and devise creative solutions for any challenges that may arise along the way. Following that, after conducting a final review of the video and making any last-minute adjustments to ensure lawlessness, our editors submit the film for an editing lead’s review for a thorough examination.
When we have an urgent request, the entire dynamic undergoes a dramatic transformation. The editor’s objective becomes hitting the bullseye right from the start. There’s no time to leisurely indulge in tea or coffee; instead, they rely on an energy drink to fuel their late-night endeavors. The luxury of pausing for a walk to ponder editing options becomes a fleeting thought. Every precious minute counts, and relaxation takes a backseat as they dive headfirst into the process with lightning speed, aiming to accomplish the task within a stringent 20-business-hour timeframe.
We talked to our chief editor Petro and are happy to look inside the details of this exciting process of making a wedding video together with you.
Petro has edited 200+ wedding films, and he shares how he edits Full Films within 20 working hours while ensuring the excellent technical quality of the project file as well. So, we invite you to also make yourself a cup of coffee or tea, and let’s dive into this exciting process.
“Our workflow begins with choosing the best software for work. To edit a wedding video within a tight 20-business-hour timeframe, my preference lies with DaVinci Resolve. This choice stems from the fact that I can bypass correction layers for color grading, streamlining the editing process. By minimizing the elements on the timeline, efficiency becomes paramount, especially when dealing with multiple cameras capturing the ceremony and reception. These cameras often employ different shooting profiles like S-LOG 3, C-LOG 3, HLG, and more.
If I were to do color correction using transforming LUTs and LUTs for grading, I would need to utilize correction layers in Premiere Pro or Final Cut. While these programs do allow comprehensive color correction on individual shots, the nature of wedding videography often entails variations in exposure set by the cameraperson. Consequently, additional adjustments are necessary before transforming the footage from Log to rec.709. Adhering to this fundamental rule is crucial in the color grading process.
Now let’s move on to how to edit a wedding video within the expedited timeframe. I meticulously divide each stage into designated working hours, strategically setting deadlines to ensure the timely completion of each milestone. This method ensures a structured and efficient workflow that enables me to deliver the final product within the demanding timeframe.
Step 1. Sorting the footage, synchronizing the first meeting, ceremony, reception, and processing audio. Deadline: 4 hours.
At this stage of work, I create the project, select the best materials for further editing by culling the footage and organizing them by events during the wedding, for example:
- Drone
- Scenery
- Wedding Details
- Prep-Girls
- Prep-Guys
- First Look
- Couple shots
- Ceremony Details
- Ceremony
- Cocktail Hour
- Pictures
- Wedding Party shots
- Reception Details
- Reception (Entrances, Formal Dances, Speeches, Shoe Game)
- Cake Cutting
- Dances
- Send Off
Each event is a separate timeline. Of course, there may be more events, but here I have described the standard events that come with most weddings. The process of sorting the source materials takes 3 hours. Following that, I move on to the synchronization phase, leveraging the superior audio synchronization capabilities offered by the PluralEyes 4 plugin. This ensures that the audio and video align seamlessly, enhancing the overall viewing experience.
Once the synchronization is complete, I import the audio files into Adobe Audition, enabling me to work with each sound element individually. Thanks to a meticulously crafted preset, fine-tuned through the integration of numerous plugins, the audio processing stage is remarkably efficient, saving valuable time and yielding exceptional results.
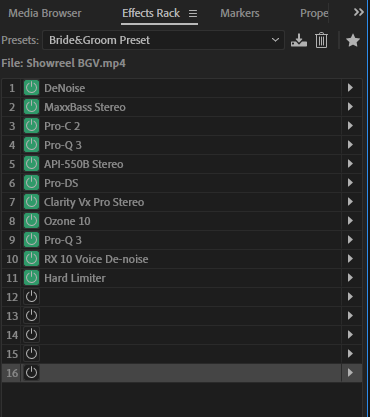
Among the arsenal of plugins at my disposal, I can only adjust the compression ratio and equalization for each distinct voice. Recognizing the uniqueness of each voice, the equalization process is tailored to their specific characteristics, ensuring optimal audio quality. As illustrated in the accompanying screenshot, I can apply several equalizers in the processing of one voice.
I also apply different degrees of background noise suppression using the Waves Clarity VX Pro plugin and mastering using the Izotope Ozone 10 plugin. At the end of the processing, I always use a limiter with a value up to -6 dB, and it should not introduce distortion or any other unwanted effects to the audio.
Thanks to the seamless integration between Audition and Premiere Pro, the rendered audio files are immediately added to Premiere Pro. Then, I transfer the three synchronized timelines (XML files) of the First Look, Ceremony, and Reception to DaVinci Resolve. This synchronization and audio work typically require around 1 hour.
Step 2. Working with multi-camera footage. Deadline: 7 hours.
Throughout this meticulous process, I break down the task into several stages:
- Multicam footage culling,
- Audio editing,
- Color correction,
- Cropping and stabilization.
Multicam footage culling
To avoid doing all the processes in sequence, I combine them, so I work on the audio together with the multi-camera footage cutting. As for the multicam footage culling, it’s simple – I switch between cameras and choose the best shots, excluding technical flaws and unsuccessful ones. Utilizing the most compelling moments, I expertly showcase the pivotal and emotionally charged segments of each event.
Audio editing
When working with audio, I switch between the audio of each speaker while also considering the overall ambiance of the room. To preserve the authentic atmosphere, including the reverberation, laughter, and applause of the guests, I often incorporate audio captured by the cameras. It’s crucial to ensure the audio levels stay at or below -10 dB to maintain a balanced sound. Additionally, I employ an equalizer to remove low frequencies when music is playing, as conflicting frequencies between the song and camera audio can arise. The audio captured by the cameras carries valuable information that contributes to maintaining the emotions of the wedding. This entire process, including working with multicam footage and audio, typically takes around 2 hours to complete.
Color correction
Next in line is the color correction process. The duration of this stage may vary based on the shooting profiles used. Matching the colors between Sony and Panasonic cameras, for instance, might require more time compared to matching colors within Sony cameras alone. The matching process is influenced by how each camera records skin tones, which can differ from camera to camera. DaVinci Resolve proves invaluable in this regard, offering a wealth of powerful color tools, including the efficient Color Space Transform feature that expedites the film editing process. Typically, I allocate around 3 hours for the essential task of color-correcting the multicam footage.
Cropping and stabilization
Here’s how it works – I go through the footage of the First Meeting, Ceremony, and Reception, and adjust the framing so that the couple is centered in the shots. I also use the rule of thirds if there are extra people in the shots (such as the videographer or photographer), I crop them out. I also use cropping if I’m aligning the horizon in the shots. Along with the cropping process, I stabilize the shots so that they look as smooth as possible and have no shakes. Furthermore, I conduct a thorough review of the footage, carefully scrutinizing for any errors in editing or color correction. This meticulous attention to detail guarantees a high-quality video, perfect for the couple’s cherished memories!
Step 3. Clip parts of the wedding film. Deadline: 9 hours.
Just like for the process of working with multicam footage, I divide and work on the clip parts of the film:
- Gathering footage
- Selecting music
- Combining footage with the music
- Color correction
- Cropping and stabilization.
Since I have timelines for events at the wedding in chronological order, I can easily divide the film into 3 parts:
- Before the ceremony (Events at the wedding numbered 1-8)
- After the ceremony, before the start of the Reception (Events at the wedding numbered 10-13)
- After the end of the official parts of the Reception (Events numbered 15-17).
Gathering footage
Organizing all the wedding events in a chronological order makes assembling the three parts of the film a seamless task. The key is to ensure a well-balanced composition of shots within the sequences. My aim is to craft a captivating and romantic narrative, facilitating smooth transitions from one event to the next. This involves incorporating shots of intricate details, breathtaking drone footage capturing the wedding venue, and fluidly moving from the bride’s makeup process to the dressing stage, all without any jarring cuts. The process of gathering footage for these three parts of the film typically takes around 3 hours.
Selecting music
The choice of music is influenced by the client’s preferences and the overall style they desire. In cases where specific songs are not provided, we rely on our extensive resources, such as Musicbed and TrackClub. When choosing music, I consider the footage I have gathered, enabling me to effortlessly capture the desired mood that complements the visuals flawlessly. Additionally, having knowledge of the approximate duration of different parts of the clips allows me to select songs of the appropriate length and utilize filtering options on the music platforms. For instance, if I require a song lasting 4-5 minutes, the platform will conveniently display options meeting that criteria!
Combining footage with the music
After carefully choosing and downloading the selected songs, I proceed to incorporate them into the corresponding clip segments. The aim is to synchronize the video footage with the music, ensuring smooth transitions between shots that align with the rhythm, instruments, or vocals. This process of harmonizing music and video editing typically takes around 2 hours.
Color correction
Next, I proceed to the color correction stage. Since the clip segments are typically filmed with one or two cameras, the matching process is expedited compared to multicam shoots during the ceremony and reception. On average, this color correction process takes approximately 2 hours.
Cropping and stabilization
The remaining 2 hours are dedicated to the vital tasks of stabilization and cropping, employing techniques similar to those I previously described when working with multicam footage.
In this way, I can edit the full documentary (20-60 min) film with 5-6 cameras in 20 working hours!
In closing
How to make a wedding video within 20 working hours? Well, it’s hard but possible. Don’t get us wrong, it’s not something we love doing. However, we understand that when videographers come with such requests, they have reasons for it. And in our memory, we’ve already saved good reputations for quite many filmmakers, and this new service has truly become a game-changer for many of them. Contact us today to discuss your project, and let’s bring your vision to life faster than a speeding bullet.
