Drawing on the mistakes an editing team sees most, this post is a set of exposure habits for wedding shooters. Shoot manual, stay near native ISO, ride the zebra function so a white dress doesn’t blow out, guard your shadow detail, and lean on ND filters and added light rather than cranking ISO. It also pushes Log or RAW and 10-bit for breathing room in the grade. For videographers who want footage that survives color correction instead of fighting clipped highlights.
Over the years in wedding video editing, we’ve been fortunate to work on over 5000 wedding projects, assisting filmmakers in delivering couples emotionally charged videos of their one-of-a-kind events. What advice could we give to videographers aiming to enhance the quality of their videos?
We want to touch on the topic of optimizing exposure during the filming process.
Frequently, we come across footage that exhibits either overexposure or underexposure issue, which can make obtaining a stellar end result more difficult. Following thorough discussions within our team and consultations with a number of our clients who have already mastered the finer nuances of videography, we would be pleased to offer several helpful recommendations on this matter.
Shot Exposure Tips and Tricks
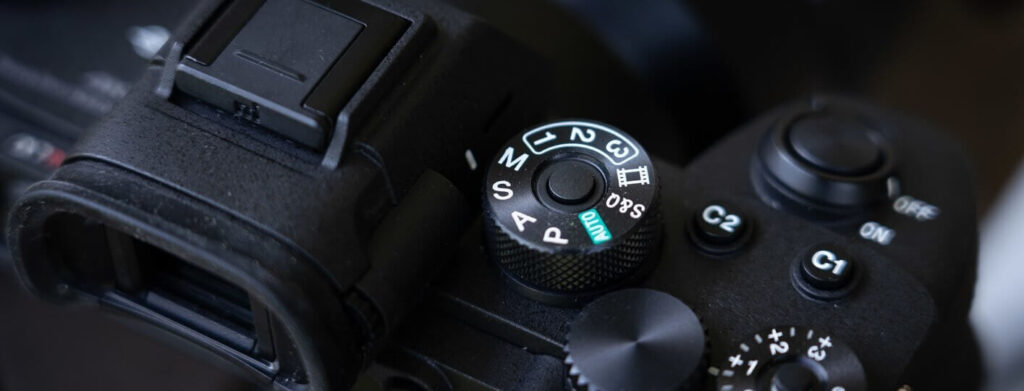
Stick to manual camera settings
In most cases, manual adjustments for exposure, aperture, and shutter speed are better than relying on automatic modes. This grants you greater control over the ultimate result.
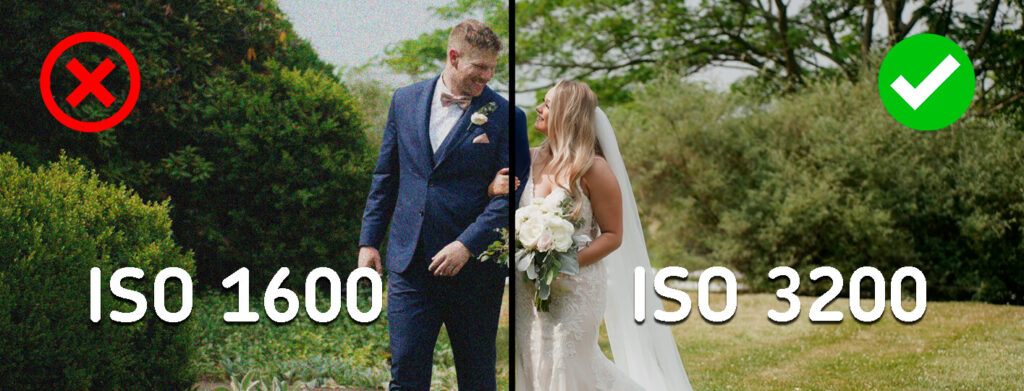
Use native ISO and dual native ISO settings
Aim to make the most of your camera’s native ISO settings to prevent adding extra noise to your shots. When it becomes necessary to adjust exposure, it’s best to depend on additional lighting. In low-light evening scenarios, you’ll frequently need to increase your ISO settings, so be sure to use robust supplementary lighting. This approach allows you to avoid pushing your ISO too high and maintain acceptable levels.
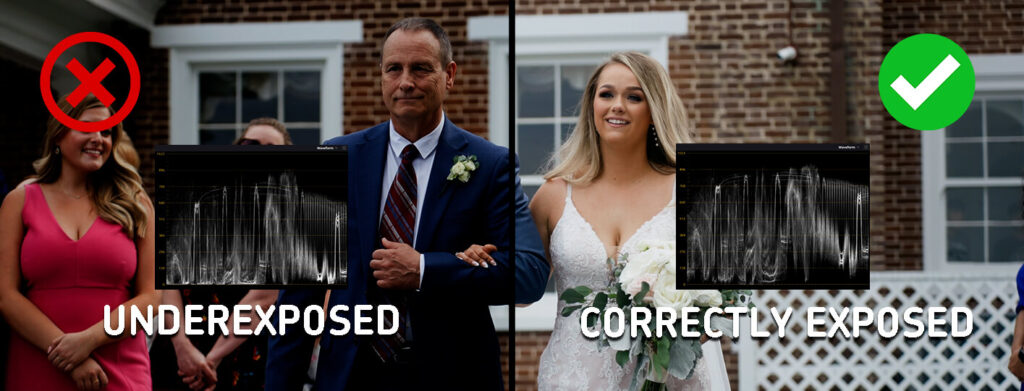
Avoid overexposure
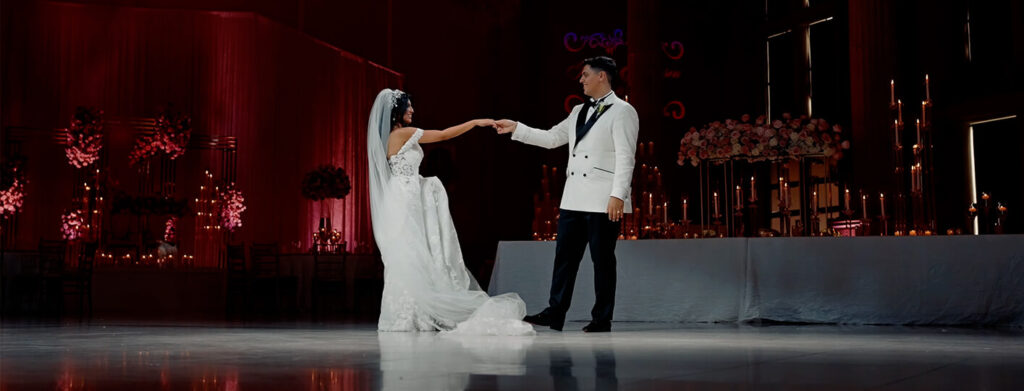
It’s crucial to avoid scenarios in which the brighter parts of the picture, such as the bride’s wedding dress, become overly bright and lose details due to overexposure. Use the “zebra” function available in cameras to pinpoint areas with overexposure. Additionally, you’ll often encounter situations where the couple is in the shadow of a tree, and you’ve adjusted the exposure for their faces, but there’s intense sunlight in the background, leading to significant overexposure in the picture. Aim to capture the couple in the shade while ensuring that the background remains properly exposed.

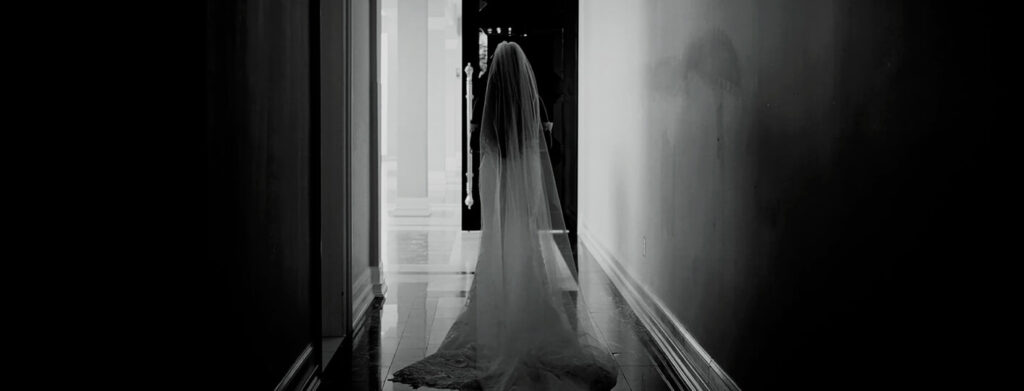
Pay attention to shadows
The darker areas of your shot hold significance as well. Make sure to retain details within the shadows to prevent information loss during post-production, particularly in evening shots.
Remember about ND filters
To enhance your flexibility in handling both bright areas and shadows, keep ND filters in mind. They enable you to avoid increasing the ISO setting, preserving optimal picture quality. Additionally, they streamline your workflow during shoots as you can simply adjust the filter ring instead of tweaking camera settings such as ISO, aperture, or shutter speed. This grants you more time to collaborate with the couple and capture more successful shots.
It’s always a good idea to have magnetic variable filters on hand, which can be easily swapped when you’re not actively shooting, providing versatility in your work. With a single, swift motion, you can adjust the exposure from 2 stops to 5 and so forth. Do not cut corners on ND filters because cheaper ones may introduce undesired distortions like imbalanced white balance and pronounced vignetting. In the higher-end options that I use in my work, these effects are nonexistent, fully justifying their price.
Have lighting sources
Always carry a few potent lighting sources for your evening shoots. You might wonder, “Why?” and we can offer several reasons:
- As we mentioned earlier, it relates to the ISO setting.
- You’ll be able to fine-tune the white balance accurately, which is essential since banquet lighting is often tinted yellow or colored. Without a “color checker,” no colorist can precisely correct the white balance.
- You’ll retain a wealth of detailed information in the shots captured by your video camera.
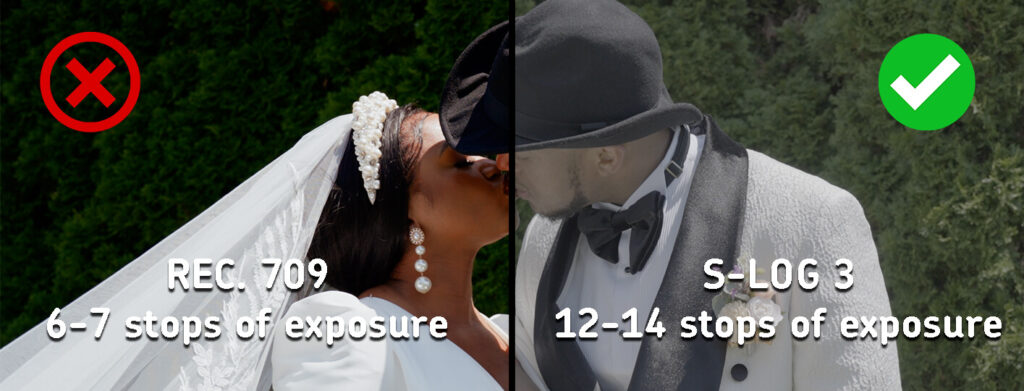
Choose the best available color space
Capture your footage in the highest quality color space available, like Log or RAW, to maximize your flexibility during color correction. It’s worth noting that in the rec.709 profile, you have around 6-7 stops of exposure, whereas, in HLG, Log, and RAW profiles, you can access up to 10 stops of exposure, providing a significant edge when adjusting exposure during color correction. Additionally, opt for a 10-bit picture (with 1024 shades and 1.07 billion colors) over an 8-bit one (256 shades and 16.78 million colors) for superior results.
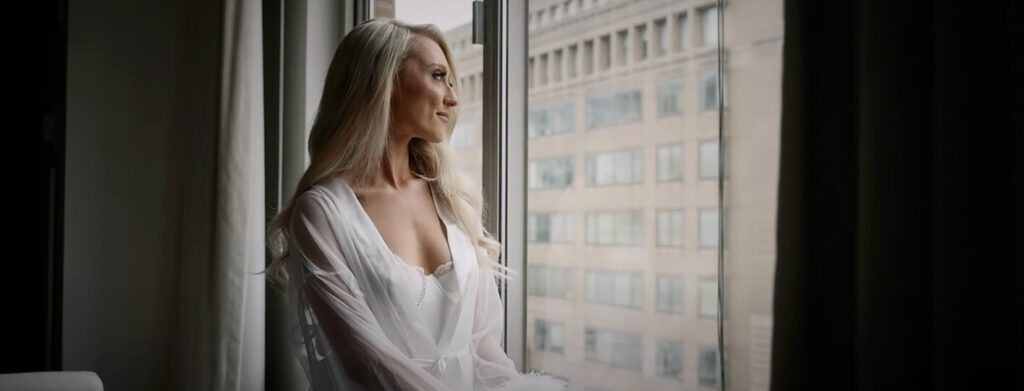
Get creative with lighting
Lighting is a key element in achieving a cinematic aesthetic, so don’t underestimate its significance if that’s your goal. To avoid the hassle of carting around extensive lighting gear, consider experimentation and making the most of what’s at your disposal. For example, position your subject opposite a window and introduce some fill light from the opposite side to soften harsh contrasts. In the background, you can position a warm-toned lamp to illuminate the backdrop, such as a wall. While backlighting is certainly advantageous, it may not always be practical in the context of wedding photography. In summary, unleash your creativity when it comes to lighting!

To Summarize
From managing exposure to grasping essential shooting parameters, every element is crucial. Employing manual settings enables utmost precision in exposure while making use of native ISO reduces noise and enhances picture richness. Steering clear of overexposure and meticulous handling of shadows aid in safeguarding all the subtleties and emotions of the moment.
Experienced wedding videographers can boost the versatility and quality of their work by incorporating ND filters, which regulate the light that reaches the camera sensor. This proves especially invaluable in scenarios with shifting lighting conditions where preserving the ideal exposure is paramount.
Opting for the right color space and recording format (like Log or RAW) unlocks greater creative freedom during post-production, enabling the crafting of distinctive video styles through color correction and grading. The role of lighting sources cannot be underestimated when it comes to setting the ambiance and tone, making the pursuit of harmonious lighting a genuine art form. We hope our recommendations will help you get the best quality footage.
—
FAQs
Can’t exposure mistakes just be fixed in editing?
Only partially, which is why this advice exists. Editors regularly receive overexposed and underexposed footage, and it makes a strong final result harder to reach. Detail that was never recorded, like a blown-out wedding dress, can’t be recovered in any grade. Post-production stretches what’s in the file; it can’t restore what the sensor never captured.
Are budget ND filters a reasonable place to start?
Cutting corners on ND filters can create more work later. Cheaper filters may introduce white balance shifts or visible vignetting, which means extra correction in post and sometimes damage that does not clean up well. A reliable variable ND gives you more control in changing light without constantly adjusting ISO, aperture, or shutter settings.
My reception footage came out tinted yellow. Could that have been avoided?
In many cases, yes, with your own light sources and a better white-balance reference on the day. Banquet lighting often runs yellow or colored, and once that tint is baked into the footage, correction becomes harder. Bringing strong supplementary lighting lets you set a cleaner white balance on the spot instead of hoping the grade can fully untangle the venue’s bulbs.
If I shoot in Log, am I safe from exposure problems?
Safer, not safe. Log and RAW profiles give you roughly 10 stops to work with against 6 or 7 in Rec.709, which is real breathing room during color correction. But latitude is a margin for error, not immunity; badly clipped highlights or crushed shadows stay damaged in any profile. Log rewards good exposure rather than excusing bad exposure.
—
Terminology
Exposure – how bright or dark the recorded image is, controlled through settings like aperture, shutter speed, and ISO. Getting it right on the wedding day saves footage from losing detail that editors can’t recover later.
Native ISO – the sensitivity setting at which a camera’s sensor produces the cleanest image with the least noise. Staying at or near native ISO, and adding light instead of cranking sensitivity, keeps evening wedding footage looking rich.
Zebra function – a camera display tool that overlays striped patterns on areas that are overexposed. It helps videographers catch problems like a blown-out wedding dress before the moment is lost.
Stops – the standard unit for measuring exposure, where each stop doubles or halves the amount of light. Profiles like Log offer around 10 stops of flexibility compared to roughly 6-7 in standard Rec.709, which matters enormously in color correction.
ND filter – a neutral density filter that sits on the lens like sunglasses, cutting the light reaching the sensor without changing colors. It lets videographers adjust exposure in bright conditions with a twist of the filter ring instead of changing camera settings.
Color space – the format a camera uses to record color and brightness information, such as Rec.709, HLG, Log, or RAW. Higher-end options preserve more data, giving editors greater freedom in color correction and grading.
10-bit – a recording depth that captures 1,024 shades per color channel and over a billion colors, compared to 256 shades in 8-bit. The extra information makes wedding footage far more flexible to grade without banding or artifacts.
Color checker – a reference card with standardized color patches filmed briefly on location. Without one, no colorist can perfectly correct white balance under tinted reception lighting.
Fill light – a secondary light source that softens harsh shadows created by the main light. Positioned opposite a window, for example, it evens out contrast on faces during indoor wedding scenes.