One project here dropped from 480 GB to about 44 GB once converted to proxies, which is the whole point of Blackmagic Proxy Generator: lighter files that reach a remote editor without the upload pain. Color is the catch worth knowing, since 8-bit proxies mangle a flat 10-bit grade while 10-bit ones stay faithful. The settings and setup get a step-by-step. Worth a look for anyone shooting log who outsources their edits.
Are you facing the challenge of sending us your massive project for editing because it exceeds 500 GB? Don’t worry, we have a solution for you! If you create proxies and send them to us, we can swiftly and efficiently edit your video, ensuring a smooth workflow.
Last year we made a quick guide for creating proxy files. In this article, we will delve into this topic more and compare proxies of varying quality and examine their impact on color grading. We will also discuss software that you can utilize to create flawless proxies.
Main nuances about proxies
Working with proxies introduces a crucial consideration: maintaining accurate color grading when replacing proxies with the original video files. This leads us to ponder how to achieve precise color grading while using proxies.
An essential factor in color accuracy is the concept of color depth, also known as bit depth. Color depth refers to the number of bits utilized to represent the color of each pixel within an image or video shot. A higher color depth allows for a broader range of color shades, resulting in more precise and faithful representations. For instance, with 8-bit color depth, a pixel can be represented by one of 256 possible color values, while 16-bit color depth expands the options to a staggering 65,536 values.
If your video was shot with 8-bit color depth, then 8-bit proxies would be an ideal solution. However, what if you were shooting with flat profiles and your video possesses a color depth of 10, 12, or even 16 bits? There is an answer! Blackmagic, in its commitment to user convenience, has developed a user-friendly software called Blackmagic Proxy Generator. This remarkable tool becomes available after installing DaVinci Resolve 18 or any later versions.
Blackmagic Proxy Generator – how it works
Upon launching the program, you will encounter a compact window divided into three distinct sections:
- Processing: This section provides a progress update on the proxy creation process, including an estimated time of completion.
- Proxy Format: Here, you can select the desired format in which the proxies should be rendered, offering flexibility based on your specific requirements.
- Watch Folders: This area enables you to add all the relevant folders where you want to generate proxies, simplifying the organization and management of your proxy workflow.
Conveniently positioned at the bottom of the window, you’ll find buttons responsible for managing the Watch Folders section, allowing you to effortlessly configure this aspect.
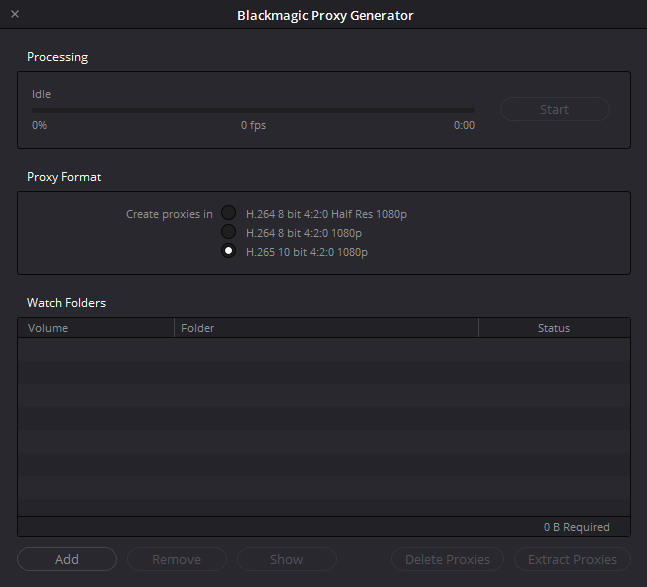
Let’s move on to the most interesting part – Proxy Format, particularly focusing on option 3, as highlighted in picture above. To illustrate its efficiency, let’s consider an example. From a project of 480 GB, proxies were created, consuming only 44 GB, which is approximately 10.9 times smaller than the original files!
We can examine the visual differences between the original shot, a 10-bit proxy, and an 8-bit proxy (with color grading applied).
Moving forward, let’s delve deeper into the details and analyze the extent of color distortion within the 8-bit proxy and 10-bit proxy, as depicted following screenshots.
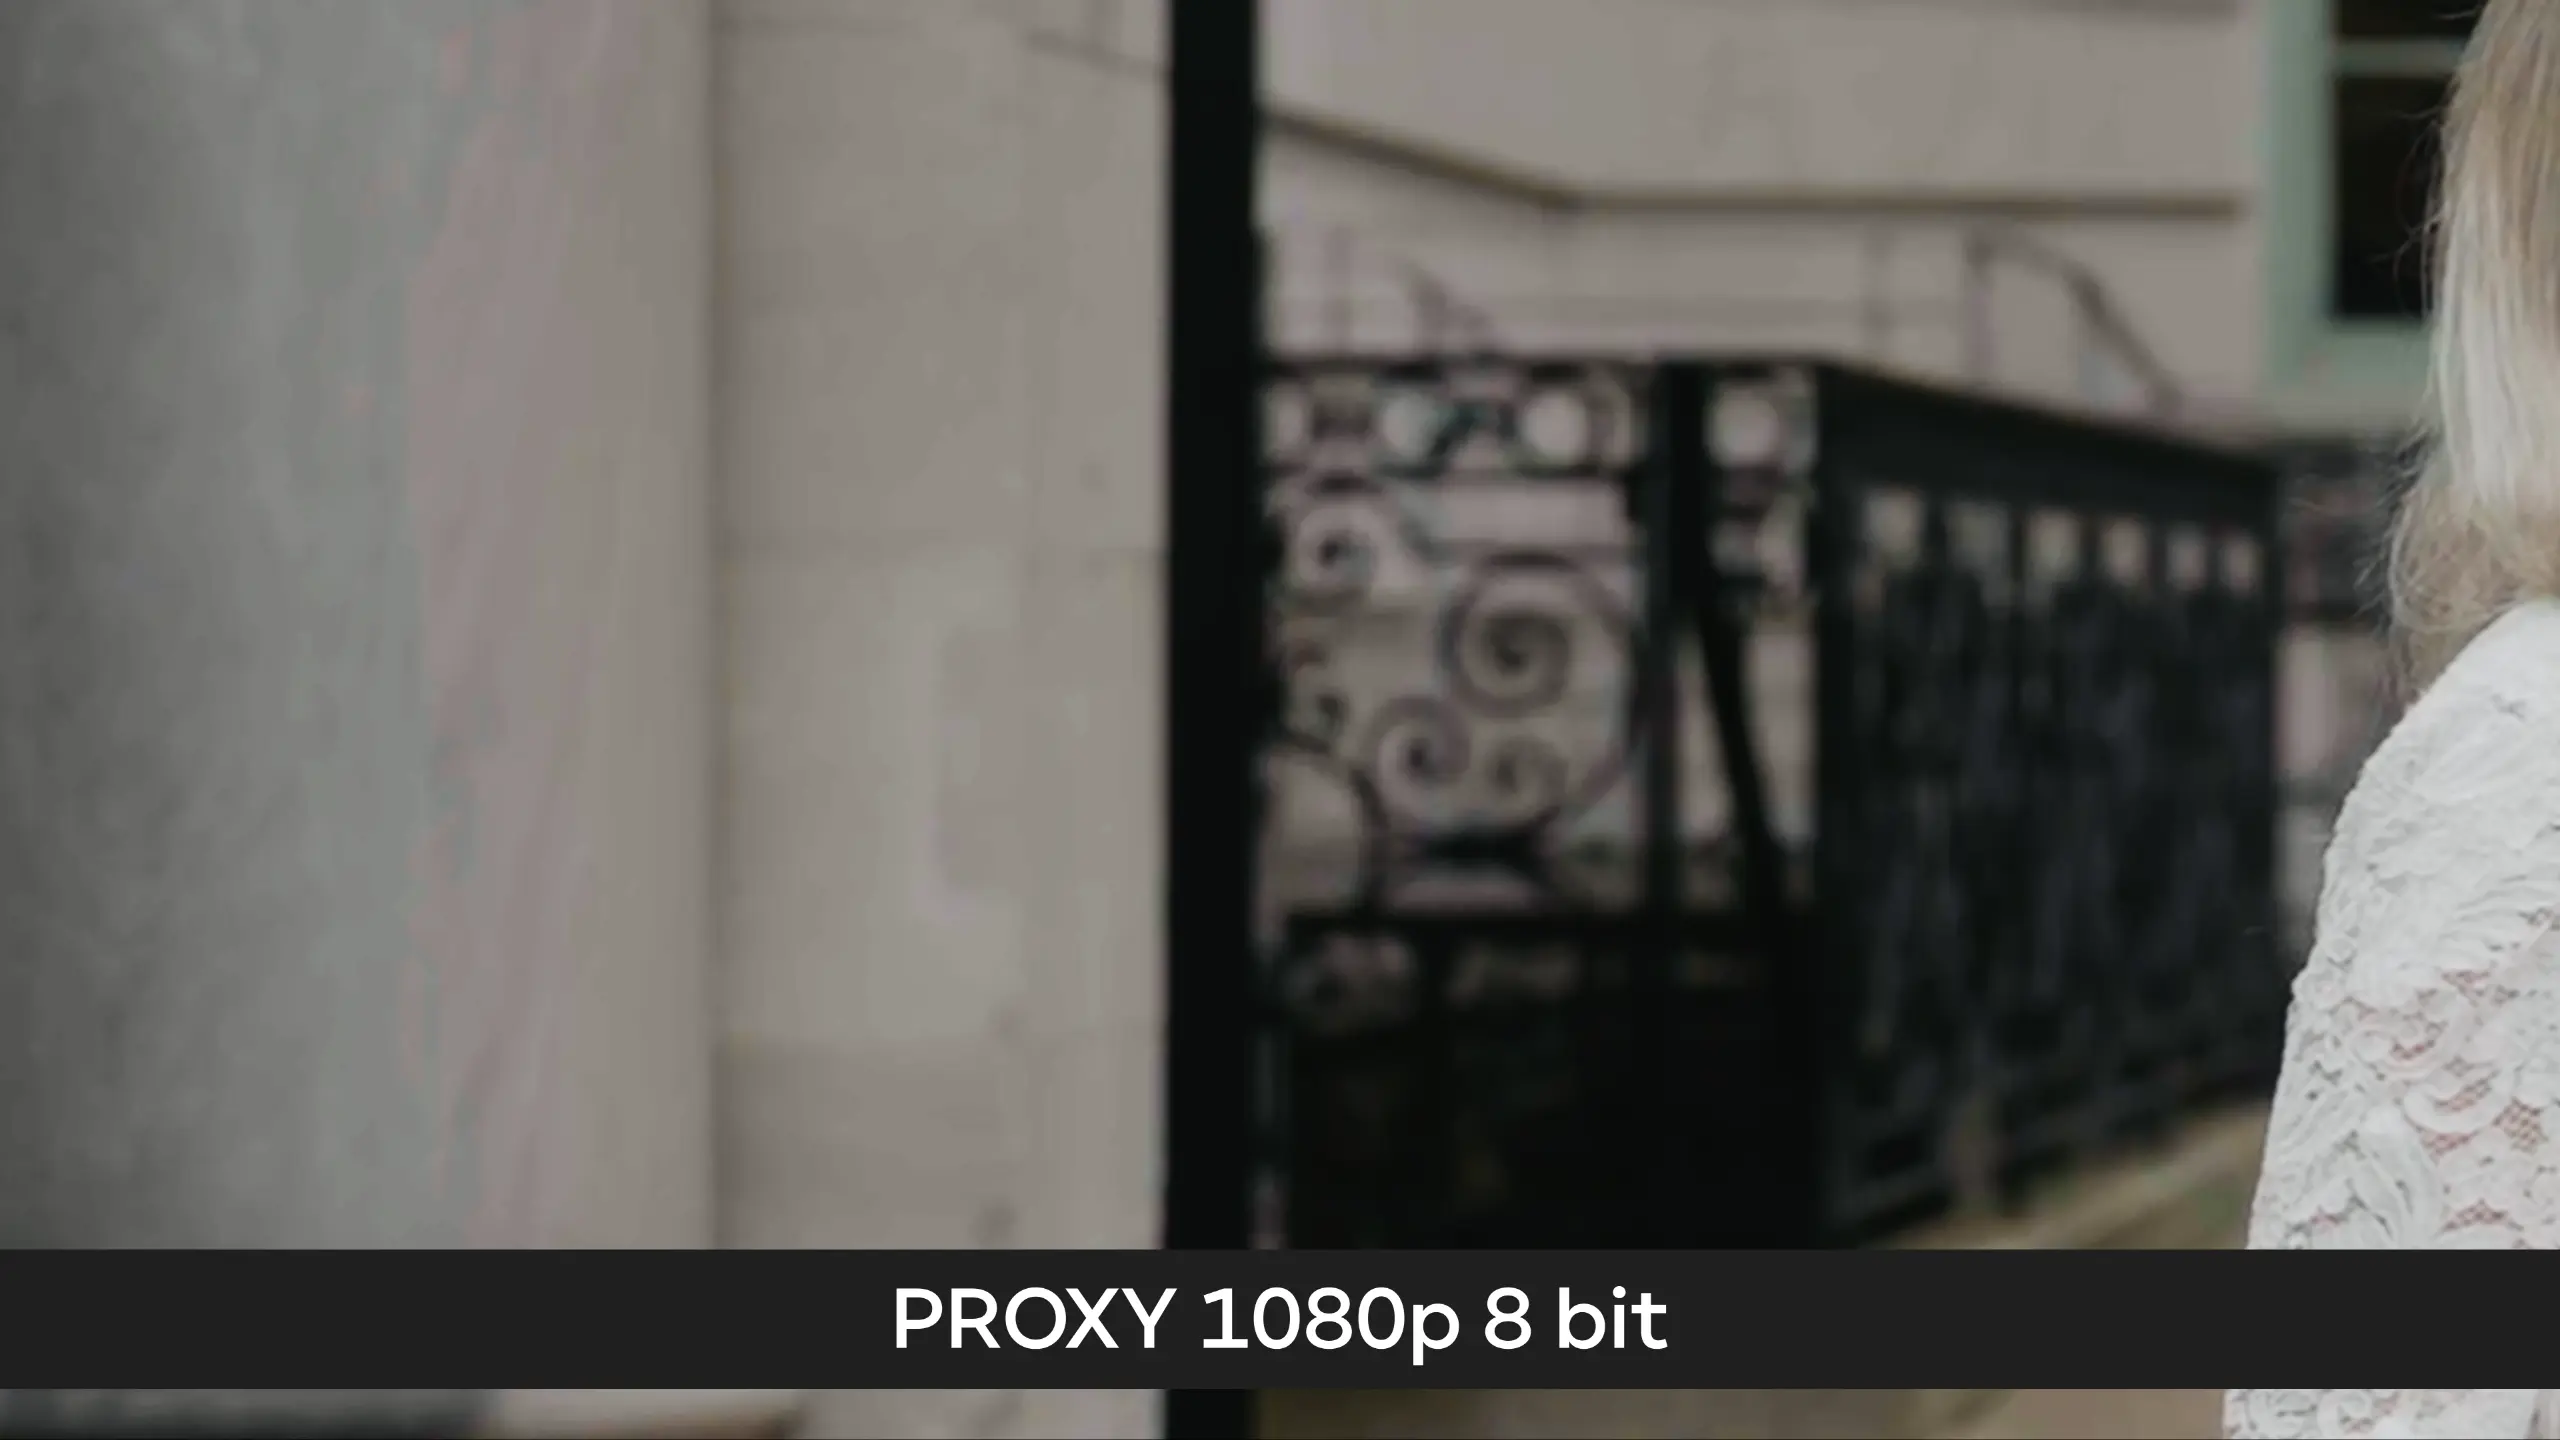

Upon examination, we can observe significant color distortions on the gray surface (on the left side of the screenshot) and within the intricate details of the iron fence (on the right side of the screenshot). Consequently, it becomes evident that opting for a 10-bit proxy is justifiable and significantly aids in maintaining color accuracy throughout your footage.
Now, let’s outline the necessary steps to utilize the Blackmagic Proxy Generator effectively:
- Drag your folder containing the original files to the Watch Folders section or click the Add button, which will prompt a window for folder selection. Choose the desired folder.
- Ensure that the third option, “H.265 10 bit 4:2:0 1080p,” is selected in the Proxy Format settings.
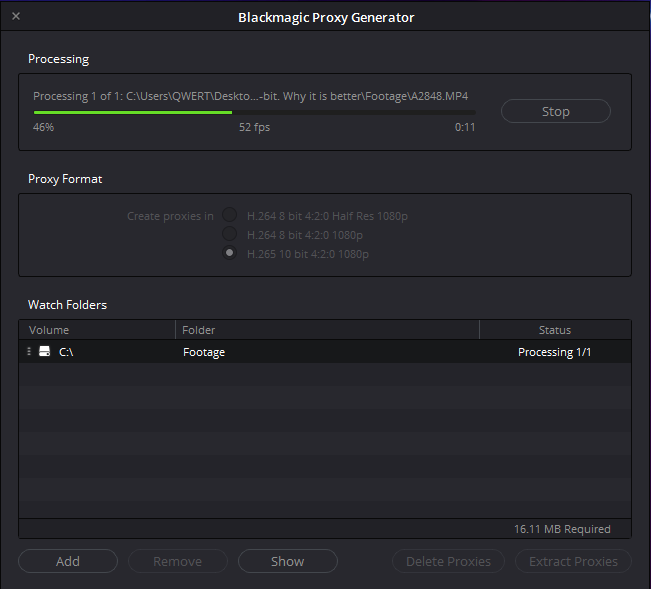
- Click the Start button in the Processing section to initiate the proxy rendering process.
Throughout this process, you can observe the progress of proxy rendering, as shown on the picture below.
Other functions of Blackmagic Proxy Generator
Additionally, let’s explore the remaining buttons located at the bottom of the Blackmagic Proxy Generator window:
- The Remove and Show buttons serve the expected functions for the selected Watch Folder within the list.
- The Delete Proxy button functions as you would anticipate, deleting all proxies while keeping the camera originals intact in the watch folder. However, if any camera originals are no longer present in the watch folder, Blackmagic Proxy Generator will not delete the proxy files, recognizing their importance in the absence of the originals.
- The Extract Proxies button provides a convenient means of creating a copy of the proxy files already generated in a selected Watch Folder. This feature allows you to choose a new location to store the proxy copies, facilitating the sharing of proxy files with a remote editor, for example.
It’s worth noting that you can also create proxies during the filming process, as they can be recorded alongside the original files. In our upcoming articles, we will explore this feature in detail, using the Sony a7 IV camera as an example.
To wrap it up, with the Blackmagic Proxy Generator at your disposal, you can streamline your proxy workflow, ensuring efficient editing and preserving color accuracy throughout your video projects.
Was slow broadband stopping you from working with remote editors? Say goodbye to the limitations imposed by file sizes and embrace the flexibility and convenience offered by this remarkable tool. Drop us a line, and we’ll set up a great workflow for you.
—
FAQs
Do proxies reduce the quality of my final wedding film?
No. Proxies are lightweight stand-ins used during the edit, and the finished film comes from your full-quality camera files. The only place proxy quality matters is in how accurately an editor can judge color while working, which is why bit depth is worth getting right even though the proxies never appear in the delivered video.
If I send proxies, do my original files need to go anywhere at all?
Plan for the originals to be needed eventually. Proxies make the edit fast and the upload manageable, but accurate final color work means swapping proxies back for the original footage, so the full-quality files have to be available at some point. Talk through the handoff with your editing partner up front: a slow background upload often does the job.
How do I know whether my footage is 8-bit or 10-bit?
Check the recording format in your camera settings or the file specs; something like “H.265 4:2:2 10-bit” tells you directly. As a rule of thumb, footage shot in flat or log profiles such as S-Log3 is usually 10-bit or higher, while standard profiles are often 8-bit. Match your proxies to that depth: 8-bit source, 8-bit proxies; log footage deserves 10-bit.
What do I need before I can start generating proxies?
Just DaVinci Resolve 18 or later, since Blackmagic Proxy Generator installs alongside it. From there the workflow is short: point a watch folder at your original files, select the H.265 10-bit 1080p format, and start processing. Some cameras can also record proxies during filming, which removes the rendering step from your post-wedding routine entirely.
—
Terminology
Proxy files – smaller, lower-size copies of your original video clips used for editing and uploading. A 480 GB wedding project can shrink to around 44 GB as proxies, which makes sharing footage with a remote editing team far more practical.
Color depth (bit depth) – the number of bits used to describe each pixel’s color, which determines how many shades the footage can hold. Higher depth, like 10-bit instead of 8-bit, gives editors more room for accurate color grading without banding or distortion.
Flat profile – a camera setting that records muted, low-contrast footage on purpose to preserve more image information. The look is corrected in post-production, where that extra data gives colorists much more flexibility.
S-Log3 – Sony’s flat recording profile that captures a wide range of brightness and color for grading later. Footage shot in S-Log3 looks washed out straight from the camera but holds far more detail than standard recording.
H.265 – a modern video compression format, also called HEVC, that keeps quality high while making files smaller. It’s the format Blackmagic Proxy Generator uses for its 10-bit 1080p proxies.
Watch folder – a folder that proxy software monitors automatically, generating proxies for any video files placed inside it. This removes the manual work of converting wedding clips one by one.