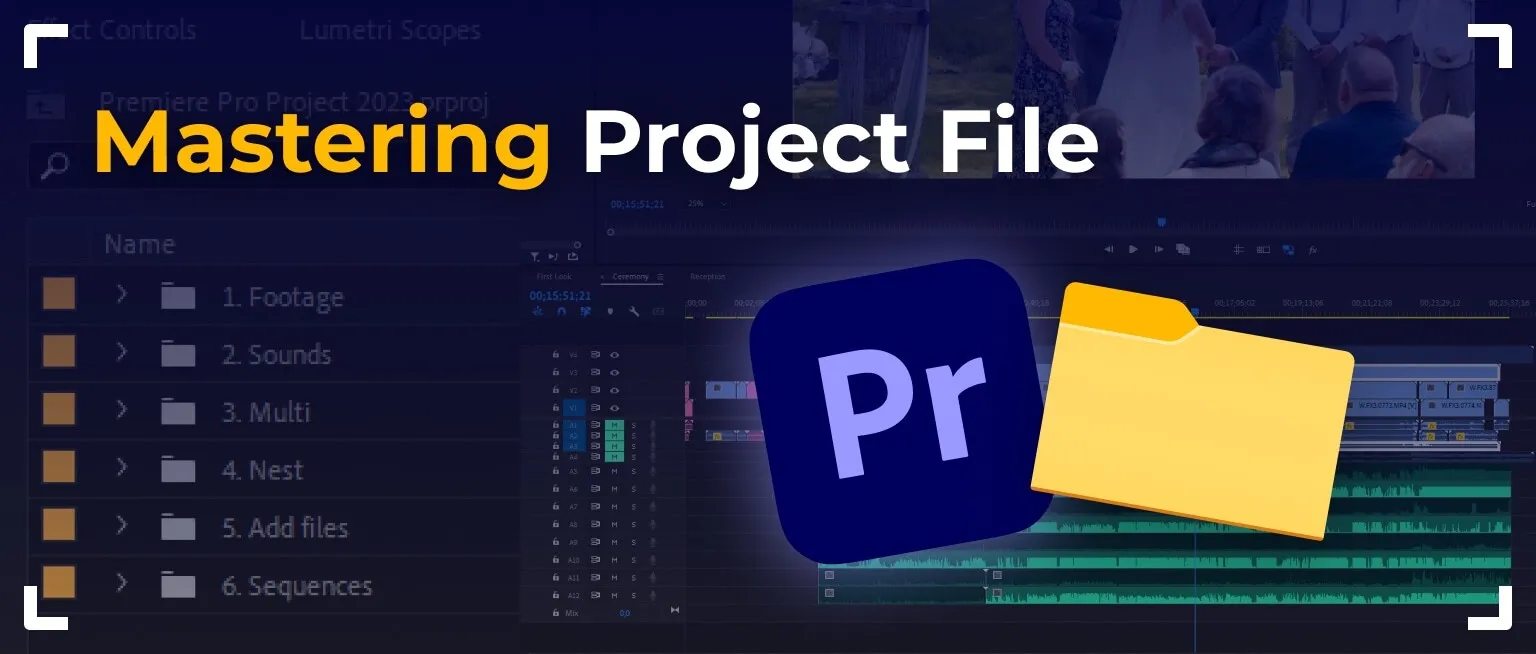
Across fifty editors and hundreds of projects, a strict folder system is what keeps Bride&Groom.video from chaos, and that system is the subject here. It lays out the standard structure (Project, Sounds, Add Files) and the in-app bins, then tackles the headache of relinking missing media in Premiere Pro when file paths don’t line up. Worth adopting for any editor or videographer who wants tidy, repeatable projects that open cleanly on someone else’s machine.
Opening project files should be a seamless process, but we can often see that it isn’t. Compatibility issues, missing media, and software glitches can disrupt your workflow and cause unnecessary stress.
Working with a large team of 50 editors and several hundred clients, we have developed a strict system for organizing files into folders to avoid such problems. All our editors work with project file folders according to the same structure. Today we will share this information with you to enhance the collaboration between videographers and editors by streamlining the process.
Folder structure
When you get a project file link, you get access to the !Project folder on our Dropbox. Let’s take a closer look at this folder.
!Project is crucial because it contains a lot of additional material, including the project itself. After opening it, you can see three more folders.
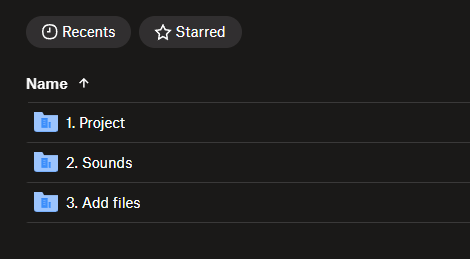
Project
It contains the project file.
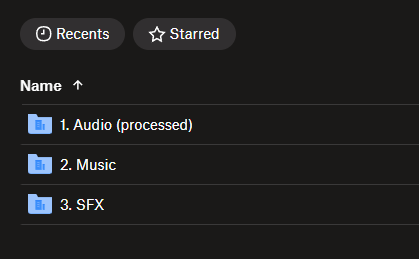
Sounds
It contains several subfolders:
- Audio (processed) (where we keep processed audio from Adobe Audition)
- Music (music for the film, highlights, etc.)
- SFX (additional sound effects)
There may be other audio subfolders here, depending on the specific project task.
Add Files.
It contains various files that the editor adds when working with the project, such as LUTs, Light Leaks, Transitions, Titles, Fonts, etc.
Now, let’s talk about how to open the project.
Before opening the project, we recommend downloading the folder shared by our manager.
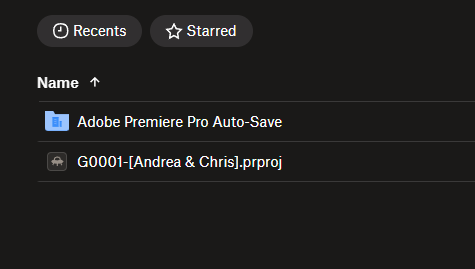
Let’s take the example of opening the project in Premiere Pro. We go to the !Project – 1. Project folder, and then we see a file with the project name. You will see similar names in every project received. It contains the project number and, in square brackets, the couple’s names.
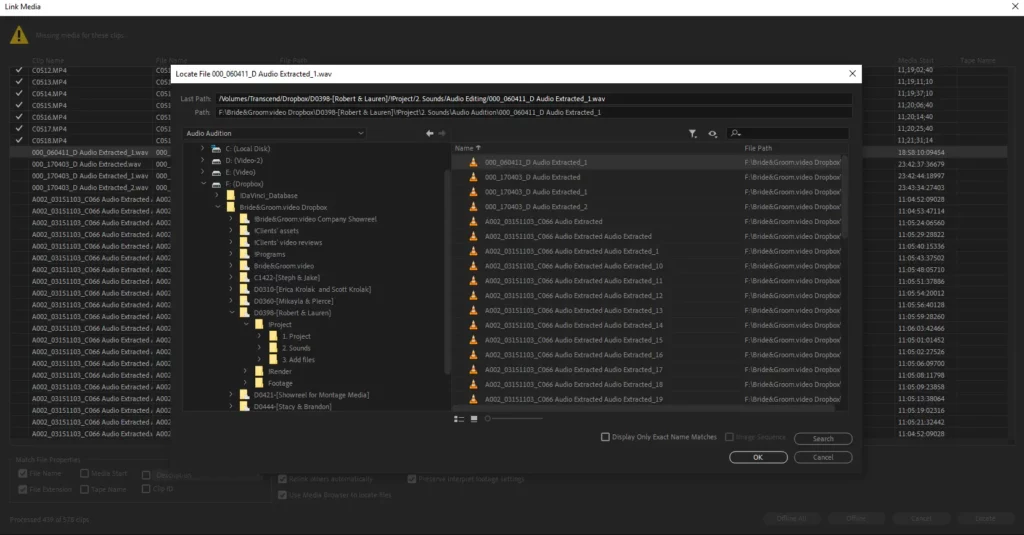
If you double-click on the project, the software opens and tries to find the source and additional files. Often, the software can’t find them because of different file paths on your computer and the editor’s computer. In this case, a Link Media window appears with the message “Missing media for these clips“.

This is easily fixable! Select one file from the list of missing files, then click the Locate button and find the file on your computer.
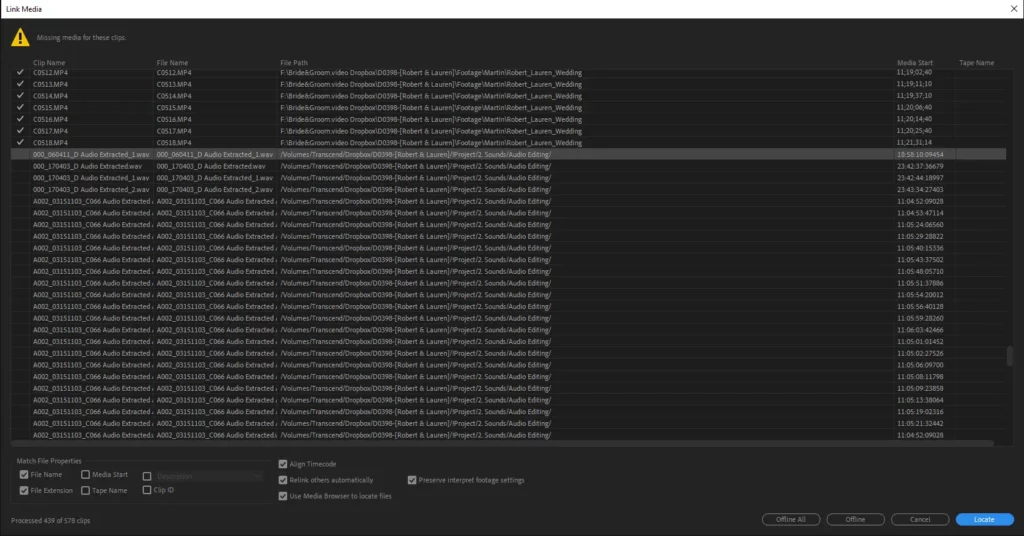
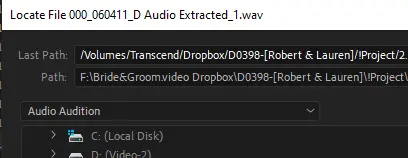
If you don’t know where the file was located, you can see the “Last Path:” line at the top of the window.
To avoid spending time searching for the file, you can click the Search button, and the program will automatically search for the file on your computer or selected drive, which may take some time. If you prefer, you can manually find the file and click the OK button after selecting it.
The software links the files. The Link Media window may appear again, and each time you will need to search for the file path. This does not depend on the editor; it is just how the software works.
At the end of this process, when all files are linked, we recommend saving the project. In addition, we do not recommend starting work immediately because Premiere Pro likes to take its time creating cache files. After 5-10 minutes, you can start working!
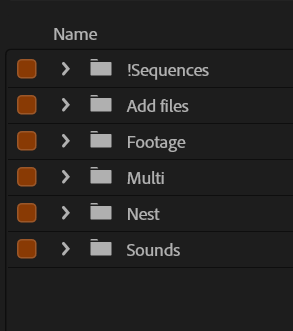
After you open the project, you will see our structure, which contains 6 folders:
- !Sequences (this folder contains 2 subfolders: Films and Wedding. The Films folder contains all the films, highlights, and teasers, and the Wedding folder contains all the additional timelines that the editor uses during the project).
- Add files (contains all materials from the Add Files folder in the file explorer).
- Footage (this is where we store the source files you sent us).
- Multi (contains the multi-camera sequences we create during the project execution. This can be Ceremony, Reception, Formal Dances, and so on).
- Nest (contains all Nest Sequences we create during the project execution. Nest Sequences are often created to stabilize shots correctly).
- Sounds (contains all the materials from the Sounds folder in the file explorer).
What are the nuances?
Nuance number 1. When the client sends us files, we do not rename them or change folder names. We leave everything as it is on the client’s computer, except for the project path. If you work on macOS, the editor may work in the Windows OS, and the source path may differ on different systems. Therefore, in every new project that the client receives from us, files need to be linked.
If the client creates the project independently and passes it on to the editor, the source path may change. The source path does not change if we provide the client with an XML (or another format) timeline (or sequence) file.
Nuance number 2. If the client sends us the original 4K files, the editor most likely creates proxies. If the client notices that the software does not detect the proxies on their computer when opening the project, they can be skipped without affecting it. Upon request, we can additionally download proxy files.
Nuance number 3. If the client sends us only proxies for editing, we work with them exactly the same way as with the original source files.
Nuance number 4. If the client sends us additional files such as LUTs, Light Leaks, Transitions, Titles, Fonts, etc., we store them together with the source files and DO NOT MOVE them to the Add files folder.
Nuance number 5. Don’t forget to check the availability of the files on your PC or Mac.
Final Words
Mastering the art of navigating project file challenges is essential for the successful collaboration of videographers and their editing teams. By implementing the structure described above, we’ve managed to reduce problems and stress.
Discover the perfect editing partner for your wedding videos – outsource with ease!
—
Terminology
Project file – the file that stores all the editing decisions for a wedding film, including timelines, cuts, and effects, but not the footage itself. It links to the source media on disk, which is why file organization matters so much when videographers and editors collaborate.
Relinking media – pointing the editing software back to source files it can’t find, usually because file paths differ between the videographer’s computer and the editor’s. The “Missing media for these clips” window in Premiere Pro is fixed by locating one file, after which the software reconnects the rest.
Proxies – lightweight copies of the original 4K footage that editors create for smoother playback during editing. If the software can’t find proxies when a videographer reopens a project, they can be safely skipped without affecting the edit.
Nest sequence – a timeline packaged inside another timeline so a group of clips behaves as one item. Editors often create these to apply stabilization to shots correctly.
Cache files – temporary files an editing program builds in the background to speed up playback. Premiere Pro needs several minutes to generate them after a project opens, which is why it’s smart to wait before starting work.
Light leaks – overlay effects that mimic streaks of light bleeding into a camera, adding a warm, dreamy touch to wedding footage. They’re stored with a project’s additional files alongside LUTs, transitions, titles, and fonts.